지갑 스마트 컨트랙트 작업하기
👋 소개
스마트 컨트랙트 개발을 시작하기 전에 TON에서 지갑과 트랜잭션이 어떻게 작동하는지 배우는 것이 중요합니다. 이 지식은 개발자들이 특정 개발 작업을 구현하기 위해 지갑, 메시지, 스마트 컨트랙트 간의 상호작용을 이해하는 데 도움이 될 것입니다.
이 튜토리얼을 읽기 전에 지갑 컨트랙트의 유형 문서를 숙지하는 것이 권장됩니다.
이 섹션에서는 개발 워크플로우를 이해하기 위해 미리 구성된 함수를 사용하지 않고 작업을 생성하는 방법을 배울 것입니다. 이 튜토리얼 분석에 필요한 모든 참조는 참고 자료 장에 있습니다.
💡 전제 조건
이 튜토리얼은 JavaScript와 TypeScript 또는 Golang에 대한 기본 지식이 필요합니다. 또한 최소 3 TON을 보유하고 있어야 합니다(거래소 계정, 비수탁 지갑 또는 Telegram 봇 지갑을 사용하여 저장 가능). 이 튜토리얼을 이해하기 위해서는 cell, TON의 주소, 블록체인의 블록체인에 대한 기본적인 이해가 필요합니다.
TON 테스트넷으로 작업하면 종종 배포 오류, 트랜잭션 추적의 어려움, 불안정한 네트워크 기능이 발생합니다. 따라서 이러한 문제를 피하기 위해 TON 메인넷에서 대부분의 개발을 완료하는 것이 유익할 수 있으며, 이는 트랜잭션 수를 줄이고 수수료를 최소화하는 데 필요할 수 있습니다.
💿 소스 코드
이 튜토리얼에서 사용된 모든 코드 예제는 다음 GitHub 저장소에서 찾을 수 있습니다.
✍️ 시작하기 위해 필요한 것
- NodeJS가 설치되어 있는지 확인하세요.
- 특정 Ton 라이브러리가 필요합니다: @ton/ton 13.5.1+, @ton/core 0.49.2+ 및 @ton/crypto 3.2.0+.
선택사항: JS 대신 Go를 사용하려면 tonutils-go 라이브러리와 GoLand IDE를 설치하여 TON에서 개발을 수행해야 합니다. 이 라이브러리는 이 튜토리얼의 GO 버전에서 사용됩니다.
- JavaScript
- Golang
npm i --save @ton/ton @ton/core @ton/crypto
go get github.com/xssnick/tonutils-go
go get github.com/xssnick/tonutils-go/adnl
go get github.com/xssnick/tonutils-go/address
⚙ 환경 설정
TypeScript 프로젝트를 생성하려면 다음 순서대로 단계를 수행해야 합니다:
- 빈 폴더를 생성합니다(WalletsTutorial로 이름 지정).
- CLI를 사용하여 프로젝트 폴더를 엽니다.
- 다음 명령을 사용하여 프로젝트를 설정하세요:
npm init -y
npm install typescript @types/node ts-node nodemon --save-dev
npx tsc --init --rootDir src --outDir build \ --esModuleInterop --target es2020 --resolveJsonModule --lib es6 \ --module commonjs --allowJs true --noImplicitAny false --allowSyntheticDefaultImports true --strict false
다음 프로세스를 수행하는데 도움이 되도록 ts-node를 사용하여 미리 컴파일하지 않고도 TypeScript 코드를 직접 실행합니다. nodemon은 디렉토리에서 파일 변경이 감지될 때 노드 애플리케이션을 자동으로 재시작하는 데 사용됩니다.
  "files": [
    "\\",
    "\\"
  ]
- 그런 다음 프로젝트 루트에 다음 내용으로
nodemon.json설정을 생성합니다:
{
  "watch": ["src"],
  "ext": ".ts,.js",
  "ignore": [],
  "exec": "npx ts-node ./src/index.ts"
}
- 프로젝트 생성 시 추가되는 "test" 대신 이 스크립트를
package.json에 추가합니다:
"start:dev": "npx nodemon"
- 프로젝트 루트에
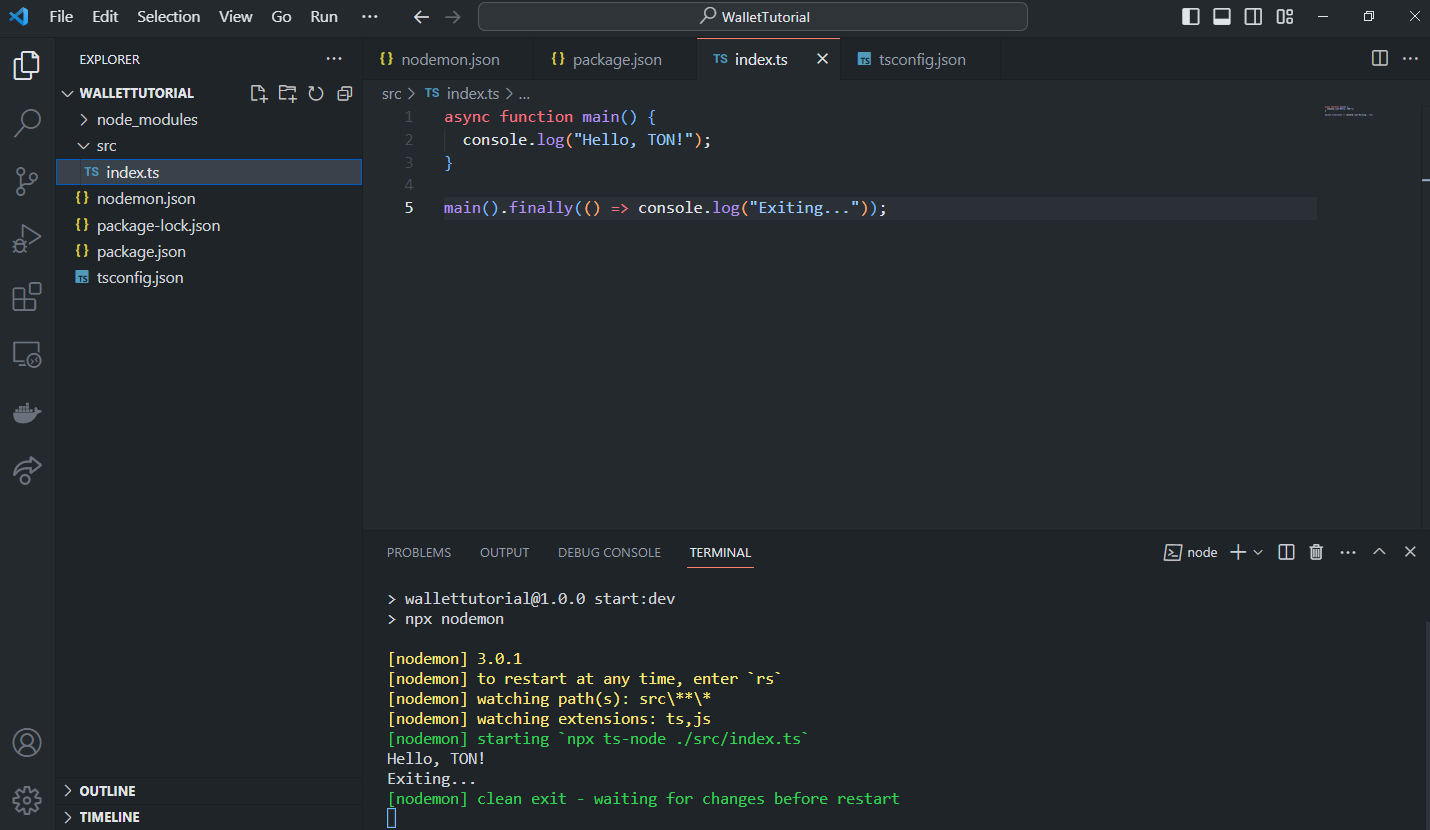
src폴더를 생성하고 이 폴더에index.ts파일을 생성합니다. - 다음 코드를 추가해야 합니다:
async function main() {
  console.log("Hello, TON!");
}

main().finally(() => console.log("Exiting..."));
- 터미널을 사용하여 코드를 실행합니다:
npm run start:dev
- 마지막으로 콘솔 출력이 나타납니다.
TON 커뮤니티는 모든 개발 프로세스(배포, 컨트랙트 작성, 테스트)를 자동화하기 위한 훌륭한 도구인 Blueprint를 만들었습니다. 하지만 이렇게 강력한 도구는 필요�하지 않으므로 위의 지침을 따르는 것이 좋습니다.
**선택사항: ** Golang을 사용할 때는 다음 지침을 따르세요:
- GoLand IDE를 설치합니다.
- 프로젝트 폴더와 다음 내용이 포함된
go.mod파일을 생성합니다(현재 버전이 오래된 경우 Go 버전을 변경해야 할 수 있음):
module main

go 1.20
- 터미널에 다음 명령을 입력합니다:
go get github.com/xssnick/tonutils-go
- 다음 내용으로 프로젝트 루트에
main.go파일을 생성합니다:
package main

import (
	"log"
)

func main() {
	log.Println("Hello, TON!")
}
go.mod의 모듈 이름을main으로 변경합니다.- 터미널에 출력이 표시될 때까지 위의 코드를 실행합니다.
GoLand가 무료가 아니므로 다른 IDE를 사용할 수 있지만 GoLand가 선호됩니다.
또한 각 새 섹션에서는 특정 코드 섹션에 필요한 임포트만 지정되며 새 임포트를 추가하고 이전 것과 결합해야 합니다.
🚀 시작하기
이 튜토리얼에서는 TON 블록체인에서 가장 많이 사용되는 지갑(버전 3과 4)에 대해 배우고 이러한 스마트 컨트랙트가 어떻게 작동하는지 알아볼 것입니다. 이를 통해 개발자들은 서로 다른 메시지 유형을 더 ��잘 이해하여 메시지 생성, 블록체인으로 전송, 지갑 배포가 더 쉬워지고, 궁극적으로 고부하 지갑과도 작업할 수 있게 됩니다.
우리의 주요 과제는 @ton/ton, @ton/core, @ton/crypto(ExternalMessage, InternalMessage, Signing 등)에 대한 다양한 객체와 함수를 사용하여 메시지를 구축하여 더 큰 규모에서 메시지가 어떻게 보이는지 이해하는 것입니다. 이 과정을 수행하기 위해 거래소, 비수탁 지갑, 대부분의 사용자가 이러한 특정 버전만 사용했기 때문에 두 가지 주요 지갑 버전(v3와 v4)을 사용할 것입니다.
There may be occasions in this tutorial when there is no explanation for particular details. In these cases, more details will be provided in later stages of this tutorial.
중요: 이 튜토리얼 전체에서 지갑 개발 프로세스를 더 잘 이해하기 위해 wallet v3 코드를 사용합니다. v3에는 r1과 r2 두 가지 하위 버전이 있다는 점에 유의해야 합니다. 현재는 두 번째 버전만 사용되고 있으며, 이는 이 문서에서 v3를 언급할 때 v3r2를 의미한다는 것을 의미합니다.
💎 TON 블록체인 지갑
TON 블록체인에서 작동하고 실행되는 모든 지갑은 실제로 스마트 컨트랙트입니다. TON에서 작동하는 모든 것이 스마트 컨트랙트인 것과 같은 방식입니다. 대부분의 블록체인과 마찬가지로 네트워크에 스마트 컨트랙트를 배포하고 다양한 용도로 사용자 정의할 수 있습니다. 이 기능 덕분에 전체 지갑 사용자 정의가 가능합니다. TON에서 지갑 스마트 컨트랙트는 플랫폼이 다른 유형의 스마트 컨트랙트와 통신하는 것을 돕습니다. 그러나 지갑 통신이 어떻게 이루어지는지 고려하는 것이 중요합니다.
지갑 통신
일반적으로 TON 블록체인에는 두 가지 메시지 유형이 있습니다: internal과 external. 외부 메시지는 외부 세계에서 블록체인으로 메시지를 보낼 수 있는 기능을 제공하므로 그러한 메시지를 수락하는 스마트 컨트랙트와 통신할 수 있습니다. 이 프로세스를 수행하는 책임이 있는 함수는 다음과 같습니다:
() recv_external(slice in_msg) impure {
    ;; some code
}
지갑에 대해 더 자세히 알아보기 전에, 지갑이 어떻게 외부 메시지를 수락하는지 살펴보겠습니다. TON에서 모든 지갑은 소유자의 public key, seqno, subwallet_id를 보유합니다. 외부 메시지를 수신할 때 지갑은 get_data() 메서드를 사용하여 지갑의 저장소 부분에서 데이터를 검색합니다. 그런 다음 여러 확인 절차를 수행하고 메시지를 수락할지 여부를 결정합니다. 이 프로세스는 다음과 같이 수행됩니다:
() recv_external(slice in_msg) impure {
  var signature = in_msg~load_bits(512); ;; get signature from the message body
  var cs = in_msg;
  var (subwallet_id, valid_until, msg_seqno) = (cs~load_uint(32), cs~load_uint(32), cs~load_uint(32));  ;; get rest values from the message body
  throw_if(35, valid_until <= now()); ;; check the relevance of the message
  var ds = get_data().begin_parse(); ;; get data from storage and convert it into a slice to be able to read values
  var (stored_seqno, stored_subwallet, public_key) = (ds~load_uint(32), ds~load_uint(32), ds~load_uint(256)); ;; read values from storage
  ds.end_parse(); ;; make sure we do not have anything in ds variable
  throw_unless(33, msg_seqno == stored_seqno);
  throw_unless(34, subwallet_id == stored_subwallet);
  throw_unless(35, check_signature(slice_hash(in_msg), signature, public_key));
  accept_message();
💡 유용한 링크:
이제 더 자세히 살펴보겠습니다.
재생 보호 - Seqno
지갑 스마트 컨트랙트의 메시지 재생 보호는 메시지가 어떤 순서로 전송되는지 추적하는 메시지 seqno(Sequence Number)와 직접적으로 관련이 있습니다. 하나의 메시지가 지갑에서 반복되지 않는 것이 매우 중요한데, 이는 시스템의 무결성을 완전히 무너뜨리기 때문입니다. 지갑 내 스마트 컨트랙트 코드를 더 자세히 살펴보면, seqno는 일반적으로 다음과 같이 처리됩니다:
throw_unless(33, msg_seqno == stored_seqno);
위의 코드 라인은 메시지에 들어오는 seqno를 확인하고 스마트 컨트랙트에 저장된 seqno와 확인합니다. 일치하지 않으면 컨트랙트는 33 exit code로 오류를 반환합니다. 따라서 발신자가 잘못된 seqno를 전달하면 메시지 순서에서 실수를 했다는 의미이며, 컨트랙트는 이러한 경우를 막아냅니다.
외부 메시지는 누구나 보낼 수 있다는 점도 고려해야 합니다. 이는 누군가에게 1 TON을 보내면 다른 사람이 이 메시지를 반복할 수 있다는 것을 의미합니다. 하지만 seqno가 증가하면 이전 외부 메시지가 무효가 되어 아무도 반복할 수 없게 되므로 자금을 훔칠 가능성을 방지합니다.
서명
앞서 언급했듯이 지갑 스마트 컨트랙트는 외부 메시지를 수락합니다. 하지만 이러한 메시지는 외부 세계에서 오며 해당 데이터를 100% 신뢰할 수 없습니다. 따라서 각 지갑은 소유자의 공개 키를 저장합니다. 스마트 컨트랙트는 소유자가 개인 키로 서명한 외부 메시지를 받을 때 공개 키를 사용하여 메시지 서명의 정당성을 확인합니다. 이는 메시지가 실제로 컨트랙트 소유자로부터 온 것임을 검증합니다.
이 프로세스를 수행하기 위해 지갑은 먼저 들어오는 메시지에서 서명을 얻어 저장소에서 공개 키를 로드하고 다음 프로세스를 사용하여 서명을 검증해야 합니다:
var signature = in_msg~load_bits(512);
var ds = get_data().begin_parse();
var (stored_seqno, stored_subwallet, public_key) = (ds~load_uint(32), ds~load_uint(32), ds~load_uint(256));
throw_unless(35, check_signature(slice_hash(in_msg), signature, public_key));
그리고 모든 검증 프로세스가 올바르게 완료되면 스마트 컨트랙트는 메시지를 수락하고 처리합니다:
accept_message();
메시지가 외부 세계에서 오기 때문에 트랜잭션 수수료를 지불하는 데 필요한 Toncoin을 포함하지 않습니다. accept_message() 함수를 사용하여 TON을 보낼 때는 gas_credit(작성 시점에서 그 값은 10,000 gas 단위)이 적용되어 gas가 gas_credit 값을 초과하지 않는 경우 필요한 계산을 무료로 수행할 수 있습니다. accept_message() 함수가 사용된 후 사용된 모든 gas(TON으로)는 스마트 컨트랙트의 잔액에서 가져갑니다. 이 프로세스에 대해 여기에서 더 자세히 읽을 수 있습니다.
트랜잭션 만료
외부 메시지의 유효성을 확인하는 또 다른 단계는 valid_until 필드입니다. 변수 이름에서 알 수 있듯이, 이는 메시지가 유효한 UNIX 시간입니다. 이 검증 프로세스가 실패하면 컨트랙트는 트랜잭션 처리를 완료하고 35 exit code를 반환합니다:
var (subwallet_id, valid_until, msg_seqno) = (cs~load_uint(32), cs~load_uint(32), cs~load_uint(32));
throw_if(35, valid_until <= now());
이 알고리즘은 메시지가 더 이상 유효하지 않지만 알 수 없는 이유로 여전히 블록체인에 전송된 경우의 다양한 오류에 대한 취약성을 방지하는 데 도움이 됩니다.
지갑 v3와 지갑 v4의 차이점
지갑 v3와 지갑 v4의 유일한 차이점은 지갑 v4가 설치하고 삭제할 수 있는 플러그인을 사용한다는 것입니다. 이러한 플러그인은 특정 시간에 지갑 스마트 컨트랙트에서 특정 수의 TON을 요청할 수 있는 특별한 스마트 컨트랙트입니다.
지갑 스마트 컨트랙트는 소유자의 참여 없이도 필요한 TON 금액을 응답으로 보냅니다. 이는 플러그인이 생성되는 구독 모델과 유사합니다. 이는 이 튜토리얼의 범위를 벗어나므로 이러한 세부사항은 배우지 않을 것입니다.
지갑이 스마트 컨트랙트와의 통신을 용이하게 하는 방법
앞서 논의했듯이, 지갑 스마트 컨트랙트는 외부 메시지를 수락하고, 검증하며, 모든 검사를 통과하면 수락합니다. 그런 다음 컨트랙트는 외부 메시지의 본문에서 메시지를 검색하는 루프를 시작한 다음 내부 메시지를 생성하고 다음과 같이 블록체인에 보냅니다:
cs~touch();
while (cs.slice_refs()) {
    var mode = cs~load_uint(8); ;; load message mode
    send_raw_message(cs~load_ref(), mode); ;; get each new internal message as a cell with the help of load_ref() and send it
}
TON에서 모든 스마트 컨트랙트는 스택 기반 TON Virtual Machine (TVM)에서 실행됩니다. ~ touch()는 더 적은 gas로 코드를 실행하도록 최적화하기 위해 변수 cs를 스택의 맨 위에 배치합니다.
하나의 cell에 최대 4개의 참조를 저장할 수 있으므로, 외부 메시지당 최대 4개의 내부 메시지를 보낼 수 있습니다.
💡 유용한 링크:
📬 외부 및 내부 메시지
이 섹션에서는 internal과 external 메시지에 대해 더 자세히 알아보고 미리 준비된 함수의 사용을 최소화하여 메시지를 생성하고 네트워크에 보낼 것입니다.
이 프로세스를 수행하기 위해서는 작업을 더 쉽게 하기 위해 준비된 지갑을 사용해야 합니다. 이를 위해:
- 지갑 앱을 설치하세요(예: 저자는 Tonkeeper를 사용)
- 지갑 앱을 v3r2 주소 버전으로 전환
- 지갑에 1 TON 입금
- 다른 주소로 메시지를 보내세요(자신에게, 같은 지갑으로 보낼 수 있음)
이렇게 하면 Tonkeeper 지갑 앱이 지갑 컨트랙트를 배포하고 다음 단계에서 사용할 수 있습니다.
이 글을 쓰는 시점에서 TON의 대부분의 지갑 앱은 기본적으로 지갑 v4 버전을 사용합니다. 이 튜토리얼에서는 플러그인이 필요하지 않으며 지갑 v3가 제공하는 기능을 사용할 것입니다. 사용 중에 Tonkeeper는 사용자가 원하는 지갑 버전을 선택할 수 있게 해줍니다. 따라서 지갑 버전 3(wallet v3)을 배포하는 것이 권장됩니다.
TL-B
앞서 언급했듯이, TON 블록체인의 모든 것은 cell로 구성된 스마트 컨트랙트입니다. 데이터를 적절하게 직렬화하고 역직렬화하기 위해서는 표준이 필요합니다. 직렬화와 역직렬화 프로세스를 수행하기 위해 TL-B가 cell 내에서 다른 방식으로 다양한 데이터 유형을 설명하는 범용 도구로 생성되었습니다.
이 섹션에서는 block.tlb를 살펴볼 것입니다. 이 파일은 미래의 개발에서 매우 유용할 것입니다. 다양한 cell이 어떻게 조립되어야 하는지 설명하기 때문입니다. 우리의 경우 특히 내부 및 외부 메시지의 복잡성에 대해 자세히 설명합니다.
이 가이드 내에서 기본 정보가 제공됩니다. 자세한 내용은 TL-B 문서를 참조하여 TL-B에 대해 더 자세히 알아보세요.
CommonMsgInfo
초기에 각 메시지는 먼저 CommonMsgInfo (TL-B) 또는 CommonMsgInfoRelaxed (TL-B)를 저장해야 합니다. 이를 통해 메시지 유형, 메시지 시간, 수신자 주소, 기술적 플래그, 수수료와 관련된 기술적 세부사항을 정의할 수 있습니다.
block.tlb 파일을 읽어보면 세 가지 유형의 CommonMsgInfo를 확인할 수 있습니다: int_msg_info$0, ext_in_msg_info$10, ext_out_msg_info$11. ext_out_msg_info TL-B 구조의 특정 세부사항에 대해서는 자세히 다루지 않을 것입니다. 다만, 이는 스마트 컨트랙트가 외부 로그로 사용하기 위해 보낼 수 있는 외부 메시지 유형입니다. 이 형식의 예시는 Elector 컨트랙트를 살펴보세요.
TL-B를 살펴보면, ext_in_msg_info 유형과 함께 사용할 때는 CommonMsgInfo만 사용할 수 있음을 알 수 있습니다. 이는 src, created_lt, created_at 등과 같은 메시지 필드가 트랜잭션 처리 중에 검증자에 의해 다시 작성되기 때문입니다. 이 경우, 메시지의 src 필드가 가장 중요한데, 메시지를 보낼 때 발신자를 알 수 없고 검증 중에 검증자가 작성하기 때문입니다. 이렇게 하면 src 필드의 주소가 올바르며 조작할 수 없다는 것이 보장됩니다.
하지만 CommonMsgInfo 구조는 MsgAddress 사양만 지원하지만, 발신자의 주소는 일반적으로 알 수 없으며 addr_none(두 개의 0비트 00)을 작성해야 합니다. 이 경우 CommonMsgInfoRelaxed 구조가 사용되며, 이는 addr_none 주소를 지원합니다. ext_in_msg_info(들어오는 외부 메시지에 사용됨)의 경우 발신자를 사용하지 않고 항상 MsgAddressExt 구조(addr_none$00은 두 개의 0비트를 의미)를 사용하기 때문에 CommonMsgInfo 구조가 사용됩니다. 이는 데이터를 덮어쓸 필요가 없다는 것을 의미합니다.
$ 기호 뒤의 숫자는 특정 구조를 식별하기 위해 읽기(역직렬화) 중에 이러한 구조의 시작 부분에 저장해야 하는 비트입니다.
내부 메시지 생성
내부 메시지는 컨트랙트 간에 메시지를 보내는 데 사용됩니다. NFT와 Jeton과 같은 다양한 컨트랙트 유형을 분석할 때 메시지를 보내는 컨트랙트 작성을 고려하면 다음과 같은 코드 라인이 자주 사용됩니다:
var msg = begin_cell()
  .store_uint(0x18, 6) ;; or 0x10 for non-bounce
  .store_slice(to_address)
  .store_coins(amount)
  .store_uint(0, 1 + 4 + 4 + 64 + 32 + 1 + 1) ;; default message headers (see sending messages page)
  ;; store something as a body
먼저 0x18과 0x10(x - 16진수)을 고려해보겠습니다. 이는 다음과 같은 방식으로 배치된 16진수입니다(6비트를 할당한다고 가정): 011000과 010000. 이는 위의 코드를 다음과 같이 다시 쓸 수 있다는 것을 의미합니다:
var msg = begin_cell()
  .store_uint(0, 1) ;; this bit indicates that we send an internal message according to int_msg_info$0
  .store_uint(1, 1) ;; IHR Disabled
  .store_uint(1, 1) ;; or .store_uint(0, 1) for 0x10 | bounce
  .store_uint(0, 1) ;; bounced
  .store_uint(0, 2) ;; src -> two zero bits for addr_none
  .store_slice(to_address)
  .store_coins(amount)
  .store_uint(0, 1 + 4 + 4 + 64 + 32 + 1 + 1) ;; default message headers (see sending messages page)
  ;; store something as a body
이제 각 옵션을 자세히 살펴보겠습니다:
| 옵션 | 설명 |
|---|---|
| IHR Disabled | 현재 이 옵션은 비활성화되어 있습니다(즉, 1을 저장). Instant Hypercube Routing이 완전히 구현되지 않았기 때문입니다. 또한 네트워크에 많은 수의 Shardchains가 라이브될 때 이것이 필요할 것입니다. IHR Disabled 옵션에 대해 자세히 알아보려면 tblkch.pdf (2장)를 참조하세요. |
| Bounce | 메시지를 보내는 동안 스마트 컨트랙트 처리 중에 다양한 오류가 발생할 수 있습니다. TON을 잃지 않기 위해 Bounce 옵션을 1(true)로 설정해야 합니다. 이 경우 트랜잭션 처리 중에 컨트랙트 오류가 발생하면 메시지가 발신자에게 반환되고 수수료를 제외한 동일한 양의 TON이 수신됩니다. 비바운스 메시지에 대해 자세히 알아보려면 여기를 참조하세요. |
| Bounced | Bounced 메시지는 스마트 컨트랙트로 트랜잭션을 처리하는 동안 오류가 발생해 발신자에게 반환되는 메시지입니다. 이 옵션은 수신된 메시지가 바운스된 것인지 여부를 알려줍니다. |
| Src | Src는 발신자 주소입니다. 이 경우 addr_none 주소를 나타내기 위해 두 개의 0비트가 작성됩니다. |
다음 두 줄의 코드:
...
.store_slice(to_address)
.store_coins(amount)
...
- 수신자와 보낼 TON 수를 지정합니다.
마지막으로 남은 코드 라인을 살펴보겠습�니다:
...
  .store_uint(0, 1) ;; Extra currency
  .store_uint(0, 4) ;; IHR fee
  .store_uint(0, 4) ;; Forwarding fee
  .store_uint(0, 64) ;; Logical time of creation
  .store_uint(0, 32) ;; UNIX time of creation
  .store_uint(0, 1) ;; State Init
  .store_uint(0, 1) ;; Message body
  ;; store something as a body
| 옵션 | 설명 |
|---|---|
| Extra currency | 이것은 기존 jeton의 네이티브 구현이며 현재 사용되지 않습니다. |
| IHR fee | 앞서 언급했듯이 IHR은 현재 사용되지 않으므로 이 수수료는 항상 0입니다. 이에 대해 자세히 알아보려면 tblkch.pdf (3.1.8)를 참조하세요. |
| Forwarding fee | 메시지 전달 수수료입니다. 자세한 내용은 수수료 문서에서 확인할 수 있습니다. |
| Logical time of creation | 올바른 메시지 대기열을 생성�하는 데 사용되는 시간입니다. |
| UNIX time of creation | UNIX에서 메시지가 생성된 시간입니다. |
| State Init | 스마트 컨트랙트 배포를 위한 코드와 소스 데이터입니다. 비트가 0으로 설정되어 있으면 State Init이 없다는 것을 의미합니다. 하지만 1로 설정된 경우 State Init이 동일한 cell(0)에 저장되어 있는지 또는 참조(1)로 작성되었는지를 나타내는 다른 비트를 작성해야 합니다. |
| Message body | 이 부분은 메시지 본문이 어떻게 저장되는지 정의합니다. 때로는 메시지 본문이 너무 커서 메시지 자체에 맞지 않습니다. 이 경우 참조로 저장해야 하며 비트는 1로 설정되어 본문이 참조로 사용됨을 나타냅니다. 비트가 0이면 본문은 메시지와 동일한 cell에 있습니다. |
State Init과 Message Body 비트를 제외한 위의 값들(src 포함)은 검증자에 의해 다시 작성됩니다.
값이 지정된 것보다 더 적은 비트에 맞는 경우 누락된 0이 값의 왼쪽에 추가됩니다. 예를 들어 0x18은 5비트에 맞습니다 -> 11000. 하지만 6비트가 지정되었으므로 최종 결과는 011000이 됩니다.
다음으로, 다른 지갑 v3로 Toncoin을 보낼 메시지를 준비하기 시작하겠습니다. 먼저, 사용자가 "Hello, TON!"이라는 텍스트와 함께 자신에게 0.5 TON을 보내고 싶다고 가정해 봅시다. 주석이 있는 메시지를 보내는 방법을 참조하세요.
- JavaScript
- Golang
import { beginCell } from '@ton/core';

let internalMessageBody = beginCell()
  .storeUint(0, 32) // write 32 zero bits to indicate that a text comment will follow
  .storeStringTail("Hello, TON!") // write our text comment
  .endCell();
import (
	"github.com/xssnick/tonutils-go/tvm/cell"
)

internalMessageBody := cell.BeginCell().
  MustStoreUInt(0, 32). // write 32 zero bits to indicate that a text comment will follow
  MustStoreStringSnake("Hello, TON!"). // write our text comment
  EndCell()
위에서 우리의 메시지 본문이 저장된 InternalMessageBody를 만들었습니다. 텍스트가 단일 Cell(1023비트)에 맞지 않을 때는 다음 문서에 따라 데이터를 여러 cell로 분할해야 한다는 점에 유의하세요. 하지만 이 경우 고수준 라이브러리가 요구사항에 따라 cell을 생성하므로 이 단계에서는 걱정할 필요가 없습니다.
다음으로, 앞서 학습한 정보에 따라 InternalMessage를 생성합니다:
- JavaScript
- Golang
import { toNano, Address } from '@ton/ton';

const walletAddress = Address.parse('put your wallet address');

let internalMessage = beginCell()
  .storeUint(0, 1) // indicate that it is an internal message -> int_msg_info$0
  .storeBit(1) // IHR Disabled
  .storeBit(1) // bounce
  .storeBit(0) // bounced
  .storeUint(0, 2) // src -> addr_none
  .storeAddress(walletAddress)
  .storeCoins(toNano("0.2")) // amount
  .storeBit(0) // Extra currency
  .storeCoins(0) // IHR Fee
  .storeCoins(0) // Forwarding Fee
  .storeUint(0, 64) // Logical time of creation
  .storeUint(0, 32) // UNIX time of creation
  .storeBit(0) // No State Init
  .storeBit(1) // We store Message Body as a reference
  .storeRef(internalMessageBody) // Store Message Body as a reference
  .endCell();
import (
  "github.com/xssnick/tonutils-go/address"
  "github.com/xssnick/tonutils-go/tlb"
)

walletAddress := address.MustParseAddr("put your address")

internalMessage := cell.BeginCell().
  MustStoreUInt(0, 1). // indicate that it is an internal message -> int_msg_info$0
  MustStoreBoolBit(true). // IHR Disabled
  MustStoreBoolBit(true). // bounce
  MustStoreBoolBit(false). // bounced
  MustStoreUInt(0, 2). // src -> addr_none
  MustStoreAddr(walletAddress).
  MustStoreCoins(tlb.MustFromTON("0.2").NanoTON().Uint64()).   // amount
  MustStoreBoolBit(false). // Extra currency
  MustStoreCoins(0). // IHR Fee
  MustStoreCoins(0). // Forwarding Fee
  MustStoreUInt(0, 64). // Logical time of creation
  MustStoreUInt(0, 32). // UNIX time of creation
  MustStoreBoolBit(false). // No State Init
  MustStoreBoolBit(true). // We store Message Body as a reference
  MustStoreRef(internalMessageBody). // Store Message Body as a reference
  EndCell()
메시지 생성
지갑 스마트 컨트랙트의 seqno(시퀀스 넘버)를 검색해야 합니다. 이를 위해 우리 지갑의 Get 메서드 "seqno"를 실행하는 요청을 보내는 데 사용할 Client를 생성합니다. 또한 메시지에 서명하기 위해 시드 문구(여기에서 지갑 생성 시 저장한)를 추가해야 합니다:
- JavaScript
- Golang
import { TonClient } from '@ton/ton';
import { mnemonicToWalletKey } from '@ton/crypto';

const client = new TonClient({
  endpoint: "https://toncenter.com/api/v2/jsonRPC", // you can replace it on https://testnet.toncenter.com/api/v2/jsonRPC for testnet
  apiKey: "put your api key" // you can get an api key from @tonapibot bot in Telegram
});

const mnemonic = 'put your mnemonic'; // word1 word2 word3
let getMethodResult = await client.runMethod(walletAddress, "seqno"); // run "seqno" GET method from your wallet contract
let seqno = getMethodResult.stack.readNumber(); // get seqno from response

const mnemonicArray = mnemonic.split(' '); // get array from string
const keyPair = await mnemonicToWalletKey(mnemonicArray); // get Secret and Public keys from mnemonic
import (
  "context"
  "crypto/ed25519"
  "crypto/hmac"
  "crypto/sha512"
  "github.com/xssnick/tonutils-go/liteclient"
  "github.com/xssnick/tonutils-go/ton"
  "golang.org/x/crypto/pbkdf2"
  "log"
  "strings"
)

mnemonic := strings.Split("put your mnemonic", " ") // get our mnemonic as array

connection := liteclient.NewConnectionPool()
configUrl := "https://ton-blockchain.github.io/global.config.json"
err := connection.AddConnectionsFromConfigUrl(context.Background(), configUrl)
if err != nil {
  panic(err)
}
client := ton.NewAPIClient(connection) // create client

block, err := client.CurrentMasterchainInfo(context.Background()) // get current block, we will need it in requests to LiteServer
if err != nil {
  log.Fatalln("CurrentMasterchainInfo err:", err.Error())
  return
}

getMethodResult, err := client.RunGetMethod(context.Background(), block, walletAddress, "seqno") // run "seqno" GET method from your wallet contract
if err != nil {
  log.Fatalln("RunGetMethod err:", err.Error())
  return
}
seqno := getMethodResult.MustInt(0) // get seqno from response

// The next three lines will extract the private key using the mnemonic phrase. We will not go into cryptographic details. With the tonutils-go library, this is all implemented, but we’re doing it again to get a full understanding.
mac := hmac.New(sha512.New, []byte(strings.Join(mnemonic, " ")))
hash := mac.Sum(nil)
k := pbkdf2.Key(hash, []byte("TON default seed"), 100000, 32, sha512.New) // In TON libraries "TON default seed" is used as salt when getting keys

privateKey := ed25519.NewKeyFromSeed(k)
따라서 seqno, keys 및 internal message가 있으며 이를 보내야 합니다. 이제 우리 지갑을 위한 메시지를 생성하고 튜토리얼 시작부분에서 사용된 순서대로 이 메시지에 데이터를 저장해야 합니다. 이는 다음과 같이 수행됩니다:
- JavaScript
- Golang
import { sign } from '@ton/crypto';

let toSign = beginCell()
  .storeUint(698983191, 32) // subwallet_id | We consider this further
  .storeUint(Math.floor(Date.now() / 1e3) + 60, 32) // Message expiration time, +60 = 1 minute
  .storeUint(seqno, 32) // store seqno
  .storeUint(3, 8) // store mode of our internal message
  .storeRef(internalMessage); // store our internalMessage as a reference

let signature = sign(toSign.endCell().hash(), keyPair.secretKey); // get the hash of our message to wallet smart contract and sign it to get signature

let body = beginCell()
  .storeBuffer(signature) // store signature
  .storeBuilder(toSign) // store our message
  .endCell();
import (
  "time"
)

toSign := cell.BeginCell().
  MustStoreUInt(698983191, 32). // subwallet_id | We consider this further
  MustStoreUInt(uint64(time.Now().UTC().Unix()+60), 32). // Message expiration time, +60 = 1 minute
  MustStoreUInt(seqno.Uint64(), 32). // store seqno
  MustStoreUInt(uint64(3), 8). // store mode of our internal message
  MustStoreRef(internalMessage) // store our internalMessage as a reference

signature := ed25519.Sign(privateKey, toSign.EndCell().Hash()) // get the hash of our message to wallet smart contract and sign it to get signature

body := cell.BeginCell().
  MustStoreSlice(signature, 512). // store signature
  MustStoreBuilder(toSign). // store our message
  EndCell()
여기서 toSign 정의에 .endCell()을 사용하지 않았다는 점에 주목하세요. 이 경우 toSign 내용을 메시지 본문에 직접 전달해야 하기 때문입니다. cell을 작성해야 하는 경우라면 참조로 저장해야 했을 것입니다.
Wallet V3에 대해 아래에서 배웠던 기본 검증 프로세스 외에도, Wallet V4 스마트 컨트랙트는 간단한 번역인지 또는 플러그인과 관련된 메시지인지 결정하기 위해 opcode를 추출합니다. 이 버전과 일치시키려면 seqno(시퀀스 넘버)를 작성한 후와 트랜잭션 모드를 지정하기 전에 storeUint(0, 8). (JS/TS), MustStoreUInt(0, 8). (Golang) 함수를 추가해야 합니다.
외부 메시지 생성
외부 세계에서 블록체인으로 내부 메시지를 전달하려면 외부 메시지 내에서 보내야 합니다. 이전에 살펴본 바와 같이 계약에 외부 메시지를 보내는 것이 목표이므로 ext_in_msg_info$10 구조만 사용해야 합니다. 이제 우리의 지갑에 보낼 외부 메시지를 생성해보겠습니다:
- JavaScript
- Golang
let externalMessage = beginCell()
  .storeUint(0b10, 2) // 0b10 -> 10 in binary
  .storeUint(0, 2) // src -> addr_none
  .storeAddress(walletAddress) // Destination address
  .storeCoins(0) // Import Fee
  .storeBit(0) // No State Init
  .storeBit(1) // We store Message Body as a reference
  .storeRef(body) // Store Message Body as a reference
  .endCell();
externalMessage := cell.BeginCell().
  MustStoreUInt(0b10, 2). // 0b10 -> 10 in binary
  MustStoreUInt(0, 2). // src -> addr_none
  MustStoreAddr(walletAddress). // Destination address
  MustStoreCoins(0). // Import Fee
  MustStoreBoolBit(false). // No State Init
  MustStoreBoolBit(true). // We store Message Body as a reference
  MustStoreRef(body). // Store Message Body as a reference
  EndCell()
| 옵션 | 설명 |
|---|---|
| Src | 발신자 주소. 들어오는 외부 메시지는 발신자를 가질 수 없으므로 항상 2개의 0비트(addr_none TL-B)가 됩니다. |
| Import Fee | 들어오는 외부 메시지 가져오기에 사용되는 수수료입니다. |
| State Init | 내부 메시지와 달리 외부 메시지의 State Init은 외부 세계에서 컨트랙트를 배포하는 데 필요합니다. 내부 메시지와 함께 사용되는 State Init을 통해 한 컨트랙트가 다른 컨트랙트를 배포할 수 있습니다. |
| Message Body | 처리를 위해 컨트랙트에 보내야 하는 메시지입니다. |
0b10(b - 이진수)는 이진 기록을 나타냅니다. 이 과정에서 두 개의 비트가 저장됩니다: 1과 0. 이렇게 하여 ext_in_msg_info$10임을 지정합니다.
이제 우리 컨트랙트에 보낼 준비가 완료된 메시지가 있습니다. 이를 수행하려면 먼저 BOC(Bag of Cells)로 직렬화한 다음 다음 코드를 사용하여 보내야 합니다:
- JavaScript
- Golang
console.log(externalMessage.toBoc().toString("base64"))

client.sendFile(externalMessage.toBoc());
import (
  "encoding/base64"
  "github.com/xssnick/tonutils-go/tl"
)

log.Println(base64.StdEncoding.EncodeToString(externalMessage.ToBOCWithFlags(false)))

var resp tl.Serializable
err = client.Client().QueryLiteserver(context.Background(), ton.SendMessage{Body: externalMessage.ToBOCWithFlags(false)}, &resp)

if err != nil {
  log.Fatalln(err.Error())
  return
}
💡 유용한 링크:
결과적으로 콘솔에 BOC 출력을 얻었고 메시지가 우리 지갑으로 보내졌습니다. base64로 인코딩된 문자열을 복사하면 toncenter를 사용하여 수동으로 메시지를 보내고 해시를 검색할 수 있습니다.
👛 지갑 배포
우리는 메시지 생성의 기본 사항을 배웠으며, 이제 이는 지갑을 배포하는 데 도움이 될 것입니다. 과거에는 지갑 앱을 통해 지갑을 배포했지만, 이번에는 수동으로 지갑을 배포해야 합니다.
이 섹션에서는 처음부터 지갑(wallet v3)을 생성하는 방법을 알아볼 것입니다. 지갑 스마트 컨트랙트��용 코드를 컴파일하고, 니모닉 문구를 생성하고, 지갑 주소를 받고, 외부 메시지와 State Init(상태 초기화)를 사용하여 지갑을 배포하는 방법을 배우게 됩니다.
니모닉 생성
지갑을 올바르게 생성하는 데 필요한 첫 번째 것은 private와 public 키를 검색하는 것입니다. 이 작업을 수행하려면 니모닉 시드 문구를 생성한 다음 암호화 라이브러리를 사용하여 개인 키와 공개 키를 추출해야 합니다.
이는 다음과 같이 수행됩니다:
- JavaScript
- Golang
import { mnemonicToWalletKey, mnemonicNew } from '@ton/crypto';

// const mnemonicArray = 'put your mnemonic'.split(' ') // get our mnemonic as array
const mnemonicArray = await mnemonicNew(24); // 24 is the number of words in a seed phrase
const keyPair = await mnemonicToWalletKey(mnemonicArray); // extract private and public keys from mnemonic
console.log(mnemonicArray) // if we want, we can print our mnemonic
import (
	"crypto/ed25519"
	"crypto/hmac"
	"crypto/sha512"
	"log"
	"github.com/xssnick/tonutils-go/ton/wallet"
	"golang.org/x/crypto/pbkdf2"
	"strings"
)

// mnemonic := strings.Split("put your mnemonic", " ") // get our mnemonic as array
mnemonic := wallet.NewSeed() // get new mnemonic

// The following three lines will extract the private key using the mnemonic phrase. We will not go into cryptographic details. It has all been implemented in the tonutils-go library, but it immediately returns the finished object of the wallet with the address and ready methods. So we’ll have to write the lines to get the key separately. Goland IDE will automatically import all required libraries (crypto, pbkdf2 and others).
mac := hmac.New(sha512.New, []byte(strings.Join(mnemonic, " ")))
hash := mac.Sum(nil)
k := pbkdf2.Key(hash, []byte("TON default seed"), 100000, 32, sha512.New) // In TON libraries "TON default seed" is used as salt when getting keys
// 32 is a key len

privateKey := ed25519.NewKeyFromSeed(k) // get private key
publicKey := privateKey.Public().(ed25519.PublicKey) // get public key from private key
log.Println(publicKey) // print publicKey so that at this stage the compiler does not complain that we do not use our variable
log.Println(mnemonic) // if we want, we can print our mnemonic
개인 키는 메시지에 서명하는 데 필요하고 공개 키는 지갑의 스마트 컨트랙트에 저장됩니다.
생성된 니모닉 시드 문구를 콘솔에 출력한 다음 저장하여 지갑의 코드를 실행할 때마다 동일한 키 쌍을 사용할 수 있도록 해야 합니다(이전 섹션에서 자세히 설명함).
서브월렛 ID
지갑이 스마트 컨트랙트라는 가장 주목할 만한 이점 중 하나는 단 하나의 개인 키를 사용하여 매우 많은 수의 지갑을 생성할 수 있다는 것입니다. 이는 TON 블록체인의 스마트 컨트랙트 주소가 stateInit을 포함한 여러 요소를 사용하여 계산되기 때문입니다. stateInit에는 블록체인의 스마트 컨트랙트 저장소에 저장되는 code와 초기 데이터가 포함됩니다.
stateInit 내의 단 하나의 비트만 변경�해도 다른 주소가 생성될 수 있습니다. 그래서 subwallet_id가 처음에 생성되었습니다. subwallet_id는 컨트랙트 저장소에 저장되며 하나의 개인 키로 많은 다른 지갑(다른 subwallet ID를 가진)을 만드는 데 사용될 수 있습니다. 이 기능은 거래소와 같은 중앙집중식 서비스와 다양한 유형의 지갑을 통합할 때 매우 유용할 수 있습니다.
기본 subwallet_id 값은 코드 라인에 따라 698983191입니다:
res.wallet_id = td::as<td::uint32>(res.config.zero_state_id.root_hash.as_slice().data());
설정 파일에서 제네시스 블록 정보(zero_state)를 검색할 수 있습니다. 이에 대한 복잡성과 ��세부사항을 이해할 필요는 없지만 subwallet_id의 기본값이 698983191이라는 것을 기억하는 것이 중요합니다.
각 지갑 컨트랙트는 다른 ID를 가진 지갑으로 보낸 요청이 있을 때를 피하기 위해 외부 메시지의 subwallet_id 필드를 확인합니다:
var (subwallet_id, valid_until, msg_seqno) = (cs~load_uint(32), cs~load_uint(32), cs~load_uint(32));
var (stored_seqno, stored_subwallet, public_key) = (ds~load_uint(32), ds~load_uint(32), ds~load_uint(256));
throw_unless(34, subwallet_id == stored_subwallet);
컨트랙트의 초기 데이터에 위 값을 추가해야 하므로 다음과 같이 변수를 저장해야 합니다:
- JavaScript
- Golang
const subWallet = 698983191;
var subWallet uint64 = 698983191
지갑 코드 컴파일
이제 private와 public 키, subwallet_id가 명확하게 정의되었으므로 지갑 코드를 컴파일해야 합니다. 이를 위해 공식 저장소에서 wallet v3 코드를 사용할 것입니다.
지갑 코드를 컴파일하려면 @ton-community/func-js 라이브러리를 사용해야 합니다.
이 라이브러리를 사용하면 FunC 코드를 컴파일하고 코드가 포함된 cell을 검색할 수 있습니다. 시작하려면 라이브러리를 설치하고 package.json에 저장(--save)해야 합니다:
npm i --save @ton-community/func-js
코드를 컴파일하는 데는 자바스크립트만 사용할 것입니다. 코드 컴파일을 위한 라이브러리가 자바스크립트 기반이기 때문입니다. 하지만 컴파일이 완료되고 cell의 base64 출력이 있으면 이 컴파일된 코드를 Go와 같은 다른 언어에서 사용할 수 있습니다.
먼저 wallet_v3.fc와 stdlib.fc 두 파일을 생성해야 합니다. 컴파일러는 stdlib.fc 라이브러리와 함께 작동합니다. asm 명령어와 일치하는 모든 필수적이고 기본적인 함수들이 이 라이브러리에서 생성되었습니다. stdlib.fc 파일은 여기에서 다운로드할 수 있습니다. wallet_v3.fc 파일에는 위의 코드를 복사해야 합니다.
이제 우리가 만들고 있는 프로젝트에 대해 다음과 같은 구조를 가지게 됩니다:
.
├── src/
│   ├── main.ts
│   ├── wallet_v3.fc
│   └── stdlib.fc
├── nodemon.json
├── package-lock.json
├── package.json
└── tsconfig.json
IDE 플러그인이 stdlib.fc 파일의 () set_seed(int) impure asm "SETRAND";와 충돌하더라도 괜찮습니다.
아래의 함수들이 사용될 것임을 나타내기 위해 wallet_v3.fc 파일의 시작 부분에 다음 줄을 추가하는 것을 잊지 마세요:
#include "stdlib.fc";
이제 스마트 컨트랙트를 컴파일하고 npm run start:dev를 사용하여 실행하는 코드를 작성해보겠습니다:
import { compileFunc } from '@ton-community/func-js';
import fs from 'fs'; // we use fs for reading content of files
import { Cell } from '@ton/core';

const result = await compileFunc({
targets: ['wallet_v3.fc'], // targets of your project
sources: {
    "stdlib.fc": fs.readFileSync('./src/stdlib.fc', { encoding: 'utf-8' }),
    "wallet_v3.fc": fs.readFileSync('./src/wallet_v3.fc', { encoding: 'utf-8' }),
}
});

if (result.status === 'error') {
console.error(result.message)
return;
}

const codeCell = Cell.fromBoc(Buffer.from(result.codeBoc, "base64"))[0]; // get buffer from base64 encoded BOC and get cell from this buffer

// now we have base64 encoded BOC with compiled code in result.codeBoc
console.log('Code BOC: ' + result.codeBoc);
console.log('\nHash: ' + codeCell.hash().toString('base64')); // get the hash of cell and convert in to base64 encoded string. We will need it further
터미널에 다음과 같은 출력이 나타날 것입니다:
Code BOC: te6ccgEBCAEAhgABFP8A9KQT9LzyyAsBAgEgAgMCAUgEBQCW8oMI1xgg0x/TH9MfAvgju/Jj7UTQ0x/TH9P/0VEyuvKhUUS68qIE+QFUEFX5EPKj+ACTINdKltMH1AL7AOgwAaTIyx/LH8v/ye1UAATQMAIBSAYHABe7Oc7UTQ0z8x1wv/gAEbjJftRNDXCx+A==

Hash: idlku00WfSC36ujyK2JVT92sMBEpCNRUXOGO4sJVBPA=
이것이 완료되면 base64로 인코딩된 출력을 사용하여 다른 라이브러리와 언어에서 지갑 코드가 포함된 동일한 cell을 검색할 수 있습니다:
- Golang
import (
  "encoding/base64"
  "github.com/xssnick/tonutils-go/tvm/cell"
)

base64BOC := "te6ccgEBCAEAhgABFP8A9KQT9LzyyAsBAgEgAgMCAUgEBQCW8oMI1xgg0x/TH9MfAvgju/Jj7UTQ0x/TH9P/0VEyuvKhUUS68qIE+QFUEFX5EPKj+ACTINdKltMH1AL7AOgwAaTIyx/LH8v/ye1UAATQMAIBSAYHABe7Oc7UTQ0z8x1wv/gAEbjJftRNDXCx+A==" // save our base64 encoded output from compiler to variable
codeCellBytes, _ := base64.StdEncoding.DecodeString(base64BOC) // decode base64 in order to get byte array
codeCell, err := cell.FromBOC(codeCellBytes) // get cell with code from byte array
if err != nil { // check if there are any error
  panic(err)
}

log.Println("Hash:", base64.StdEncoding.EncodeToString(codeCell.Hash())) // get the hash of our cell, encode it to base64 because it has []byte type and output to the terminal
터미널에 다음과 같은 출력이 나타날 것입니다:
idlku00WfSC36ujyK2JVT92sMBEpCNRUXOGO4sJVBPA=
위 과정이 완료된 후 해시가 일치하므로 우리 cell에 올바른 코드를 사용하고 있다는 것이 확인되었습니다.
배포를 위한 State Init 생성하기
메시지를 빌드하기 전에 State Init이 무엇인지 이해하는 것이 중요합니다. 먼저 TL-B 스키마를 살펴보겠습니다:
| 옵션 | 설명 |
|---|---|
| split_depth | 이 옵션은 여러 샤드체인에 분할되어 위치할 수 있는 고부하 스마트 컨트랙트를 위한 것입니다. 이 작동 방식에 대한 자세한 정보는 tblkch.pdf (4.1.6)에서 찾을 수 있습니다. 지갑 스마트 컨트랙트 내에서만 사용되므로 0 비트만 저장됩니다. |
| special | TicTok에 사용됩니다. 이러한 스마트 컨트랙트는 각 블록마다 자동으로 호출되며 일반 스마트 컨트랙트에는 필요하지 않습니다. 이에 대한 정보는 이 섹션 또는 tblkch.pdf (4.1.6)에서 찾을 수 있습니다. 이러한 기능이 필요하지 않으므로 이 사양 내에서 0 비트만 저장됩니다. |
| code | 1 비트는 참조로써 스마트 컨트랙트 코드의 존재를 의미합니다. |
| data | 1 비트는 참조로써 스마트 컨트랙트 데이터의 존재를 의미합니다. |
| library | 마스터체인에서 작동하며 다른 스마트 컨트랙트가 사용할 수 있는 라이브러리입니다. 이는 지갑에 사용되지 않으므로 비트�는 0으로 설정됩니다. 이에 대한 정보는 tblkch.pdf (1.8.4)에서 찾을 수 있습니다. |
다음으로 배포 직후 우리 컨트랙트의 저장소에 있을 초기 데이터를 준비해 보겠습니다:
- JavaScript
- Golang
import { beginCell } from '@ton/core';

const dataCell = beginCell()
  .storeUint(0, 32) // Seqno
  .storeUint(698983191, 32) // Subwallet ID
  .storeBuffer(keyPair.publicKey) // Public Key
  .endCell();
dataCell := cell.BeginCell().
  MustStoreUInt(0, 32). // Seqno
  MustStoreUInt(698983191, 32). // Subwallet ID
  MustStoreSlice(publicKey, 256). // Public Key
  EndCell()
이 단계에서 컨트랙트의 code와 초기 data가 모두 준비되었습니다. 이 데이터로 우리는 지갑 주소를 생성할 수 있습니다. 지갑의 주소는 코드와 초기 데이터를 포함하는 State Init에 따라 달라집니다.
- JavaScript
- Golang
import { Address } from '@ton/core';

const stateInit = beginCell()
  .storeBit(0) // No split_depth
  .storeBit(0) // No special
  .storeBit(1) // We have code
  .storeRef(codeCell)
  .storeBit(1) // We have data
  .storeRef(dataCell)
  .storeBit(0) // No library
  .endCell();

const contractAddress = new Address(0, stateInit.hash()); // get the hash of stateInit to get the address of our smart contract in workchain with ID 0
console.log(`Contract address: ${contractAddress.toString()}`); // Output contract address to console
import (
  "github.com/xssnick/tonutils-go/address"
)

stateInit := cell.BeginCell().
  MustStoreBoolBit(false). // No split_depth
  MustStoreBoolBit(false). // No special
  MustStoreBoolBit(true). // We have code
  MustStoreRef(codeCell).
  MustStoreBoolBit(true). // We have data
  MustStoreRef(dataCell).
  MustStoreBoolBit(false). // No library
  EndCell()

contractAddress := address.NewAddress(0, 0, stateInit.Hash()) // get the hash of stateInit to get the address of our smart contract in workchain with ID 0
log.Println("Contract address:", contractAddress.String()) // Output contract address to console
State Init을 사용하여 이제 메시지를 만들어 블록체인에 보낼 수 있습니다.
To carry out this process, a minimum wallet balance of 0.1 TON is required (the balance can be less, but this amount is guaranteed to be sufficient). To accomplish this, we’ll need to run the code mentioned earlier in the tutorial, obtain the correct wallet address, and send 0.1 TON to this address. Alternatively, you can send this sum manually via your wallet app before sending the deployment message itself.
외부 메시지를 통한 배포는 여기서는 주로 교육 목적으로 다룹니다. 실제로는 나중에 설명할 지갑을 통한 스마트 컨트랙트 배포가 훨씬 더 편리합니다.
이전 섹션에서 만든 것과 비슷한 메시지를 만들어 보겠습니다:
- JavaScript
- Golang
import { sign } from '@ton/crypto';
import { toNano } from '@ton/core';

const internalMessageBody = beginCell()
  .storeUint(0, 32)
  .storeStringTail("Hello, TON!")
  .endCell();

const internalMessage = beginCell()
  .storeUint(0x10, 6) // no bounce
  .storeAddress(Address.parse("put your first wallet address from were you sent 0.1 TON"))
  .storeCoins(toNano("0.03"))
  .storeUint(1, 1 + 4 + 4 + 64 + 32 + 1 + 1) // We store 1 that means we have body as a reference
  .storeRef(internalMessageBody)
  .endCell();

// message for our wallet
const toSign = beginCell()
  .storeUint(subWallet, 32)
  .storeUint(Math.floor(Date.now() / 1e3) + 60, 32)
  .storeUint(0, 32) // We put seqno = 0, because after deploying wallet will store 0 as seqno
  .storeUint(3, 8)
  .storeRef(internalMessage);

const signature = sign(toSign.endCell().hash(), keyPair.secretKey);
const body = beginCell()
  .storeBuffer(signature)
  .storeBuilder(toSign)
  .endCell();
import (
  "github.com/xssnick/tonutils-go/tlb"
  "time"
)

internalMessageBody := cell.BeginCell().
  MustStoreUInt(0, 32).
  MustStoreStringSnake("Hello, TON!").
  EndCell()

internalMessage := cell.BeginCell().
  MustStoreUInt(0x10, 6). // no bounce
  MustStoreAddr(address.MustParseAddr("put your first wallet address from were you sent 0.1 TON")).
  MustStoreBigCoins(tlb.MustFromTON("0.03").NanoTON()).
  MustStoreUInt(1, 1 + 4 + 4 + 64 + 32 + 1 + 1). // We store 1 that means we have body as a reference
  MustStoreRef(internalMessageBody).
  EndCell()

// message for our wallet
toSign := cell.BeginCell().
  MustStoreUInt(subWallet, 32).
  MustStoreUInt(uint64(time.Now().UTC().Unix()+60), 32).
  MustStoreUInt(0, 32). // We put seqno = 0, because after deploying wallet will store 0 as seqno
  MustStoreUInt(3, 8).
  MustStoreRef(internalMessage)

signature := ed25519.Sign(privateKey, toSign.EndCell().Hash())
body := cell.BeginCell().
  MustStoreSlice(signature, 512).
  MustStoreBuilder(toSign).
	EndCell()
이제 올바른 State Init과 Message Body가 완성되었습니다.
외부 메시지 보내기
주요 차이점은 외부 메시지의 존재입니다. State Init은 올바른 컨트랙트 배포를 수행하기 위해 저장됩니다. 컨트랙트는 아직 자체 코드가 없기 때문에 내부 메시지를 처리할 수 없습니다. 따라서 "Hello, TON!" 코멘트가 포함된 메시지를 처리할 수 있도��록 성공적으로 배포된 후에 코드와 초기 데이터를 보냅니다:
- JavaScript
- Golang
const externalMessage = beginCell()
  .storeUint(0b10, 2) // indicate that it is an incoming external message
  .storeUint(0, 2) // src -> addr_none
  .storeAddress(contractAddress)
  .storeCoins(0) // Import fee
  .storeBit(1) // We have State Init
  .storeBit(1) // We store State Init as a reference
  .storeRef(stateInit) // Store State Init as a reference
  .storeBit(1) // We store Message Body as a reference
  .storeRef(body) // Store Message Body as a reference
  .endCell();
externalMessage := cell.BeginCell().
  MustStoreUInt(0b10, 2). // indicate that it is an incoming external message
  MustStoreUInt(0, 2). // src -> addr_none
  MustStoreAddr(contractAddress).
  MustStoreCoins(0). // Import fee
  MustStoreBoolBit(true). // We have State Init
  MustStoreBoolBit(true).  // We store State Init as a reference
  MustStoreRef(stateInit). // Store State Init as a reference
  MustStoreBoolBit(true). // We store Message Body as a reference
  MustStoreRef(body). // Store Message Body as a reference
  EndCell()
마지막으로 우리 지갑을 배포하고 사용하기 위해 메시지를 블록체인에 보낼 수 있습니다.
- JavaScript
- Golang
import { TonClient } from '@ton/ton';

const client = new TonClient({
  endpoint: "https://toncenter.com/api/v2/jsonRPC",
  apiKey: "put your api key" // you can get an api key from @tonapibot bot in Telegram
});

client.sendFile(externalMessage.toBoc());
import (
  "context"
  "github.com/xssnick/tonutils-go/liteclient"
  "github.com/xssnick/tonutils-go/tl"
  "github.com/xssnick/tonutils-go/ton"
)

connection := liteclient.NewConnectionPool()
configUrl := "https://ton-blockchain.github.io/global.config.json"
err := connection.AddConnectionsFromConfigUrl(context.Background(), configUrl)
if err != nil {
  panic(err)
}
client := ton.NewAPIClient(connection)

var resp tl.Serializable
err = client.Client().QueryLiteserver(context.Background(), ton.SendMessage{Body: externalMessage.ToBOCWithFlags(false)}, &resp)
if err != nil {
  log.Fatalln(err.Error())
  return
}
mode 3으로 내부 메시지를 보냈다는 점에 주목하세요. 같은 지갑을 다시 배포해야 하는 경우, 스마트 컨트랙트를 제거할 수 있습니다. 이를 위해서는 128(스마트 컨트랙트의 전체 잔액 가져오기) + 32(스마트 컨트랙트 제거)를 더해 160으로 mode를 설정하면 됩니다. 이렇게 하면 남은 TON 잔액을 회수하고 지갑을 다시 배포할 수 있습니다.
각각의 새로운 트랜잭션에서 seqno를 1씩 증가시켜야 한다는 점을 기억하세요.
💸 지갑 스마트 컨트랙트 작업하기
이 튜토리얼의 전반부를 완료했으므로 이제 지갑 스마트 컨트랙트가 어떻게 개발되고 사용되는지 훨씬 더 잘 알게 되었습니다. 우리는 그것들을 배포하고 제거하는 방법과 사전 구성된 라이브러리 함수에 의존하지 않고 메시지를 보내는 방법을 배웠습니다. 위에서 배운 내용을 더 적용하기 위해 다음 섹션에서는 더 복잡한 메시지를 만들고 보내는 데 초점을 맞추겠습니다.
여러 메시지 동��시에 보내기
이미 알고 있듯이, 하나의 셀은 최대 1023비트의 데이터와 다른 셀에 대한 최대 4개의 참조를 저장할 수 있습니다. 튜토리얼의 첫 번째 섹션에서 내부 메시지가 '전체' 루프로 링크로 전달되고 전송되는 방법을 자세히 설명했습니다. 이것은 외부 메시지 내에 최대 4개의 내부 메시지를 저장할 수 있다는 것을 의미합니다. 이를 통해 한 번에 4개의 메시지를 보낼 수 있습니다.
이를 위해서는 4개의 서로 다른 내부 메시지를 만들어야 합니다. 이것은 수동으로 하거나 loop를 통해 할 수 있습니다. TON 금액의 배열, 코멘트의 배열, 메시지의 배열 이렇게 3개의 배열이 필요합니다. 메시지를 위해서는 또 다른 배열인 internalMessages를 준비해야 합니다.
- JavaScript
- Golang
import { Cell } from '@ton/core';

const internalMessagesAmount = ["0.01", "0.02", "0.03", "0.04"];
const internalMessagesComment = [
  "Hello, TON! #1",
  "Hello, TON! #2",
  "", // Let's leave the third message without comment
  "Hello, TON! #4"
]
const destinationAddresses = [
  "Put any address that belongs to you",
  "Put any address that belongs to you",
  "Put any address that belongs to you",
  "Put any address that belongs to you"
] // All 4 addresses can be the same

let internalMessages:Cell[] = []; // array for our internal messages
import (
  "github.com/xssnick/tonutils-go/tvm/cell"
)

internalMessagesAmount := [4]string{"0.01", "0.02", "0.03", "0.04"}
internalMessagesComment := [4]string{
  "Hello, TON! #1",
  "Hello, TON! #2",
  "", // Let's leave the third message without comment
  "Hello, TON! #4",
}
destinationAddresses := [4]string{
  "Put any address that belongs to you",
  "Put any address that belongs to you",
  "Put any address that belongs to you",
  "Put any address that belongs to you",
} // All 4 addresses can be the same

var internalMessages [len(internalMessagesAmount)]*cell.Cell // array for our internal messages
모든 메시지의 전송 모드는 mode 3�으로 설정됩니다. 하지만 다른 모드가 필요한 경우 서로 다른 목적을 위한 배열을 만들 수 있습니다.
- JavaScript
- Golang
import { Address, beginCell, toNano } from '@ton/core';

for (let index = 0; index < internalMessagesAmount.length; index++) {
  const amount = internalMessagesAmount[index];

  let internalMessage = beginCell()
      .storeUint(0x18, 6) // bounce
      .storeAddress(Address.parse(destinationAddresses[index]))
      .storeCoins(toNano(amount))
      .storeUint(0, 1 + 4 + 4 + 64 + 32 + 1);

  /*
      At this stage, it is not clear if we will have a message body.
      So put a bit only for stateInit, and if we have a comment, in means
      we have a body message. In that case, set the bit to 1 and store the
      body as a reference.
  */

  if(internalMessagesComment[index] != "") {
    internalMessage.storeBit(1) // we store Message Body as a reference

    let internalMessageBody = beginCell()
      .storeUint(0, 32)
      .storeStringTail(internalMessagesComment[index])
      .endCell();

    internalMessage.storeRef(internalMessageBody);
  }
  else
    /*
        Since we do not have a message body, we indicate that
        the message body is in this message, but do not write it,
        which means it is absent. In that case, just set the bit to 0.
    */
    internalMessage.storeBit(0);

  internalMessages.push(internalMessage.endCell());
}
import (
  "github.com/xssnick/tonutils-go/address"
  "github.com/xssnick/tonutils-go/tlb"
)

for i := 0; i < len(internalMessagesAmount); i++ {
  amount := internalMessagesAmount[i]

  internalMessage := cell.BeginCell().
    MustStoreUInt(0x18, 6). // bounce
    MustStoreAddr(address.MustParseAddr(destinationAddresses[i])).
    MustStoreBigCoins(tlb.MustFromTON(amount).NanoTON()).
    MustStoreUInt(0, 1+4+4+64+32+1)

  /*
      At this stage, it is not clear if we will have a message body.
      So put a bit only for stateInit, and if we have a comment, in means
      we have a body message. In that case, set the bit to 1 and store the
      body as a reference.
  */

  if internalMessagesComment[i] != "" {
    internalMessage.MustStoreBoolBit(true) // we store Message Body as a reference

    internalMessageBody := cell.BeginCell().
      MustStoreUInt(0, 32).
      MustStoreStringSnake(internalMessagesComment[i]).
      EndCell()

    internalMessage.MustStoreRef(internalMessageBody)
  } else {
    /*
        Since we do not have a message body, we indicate that
        the message body is in this message, but do not write it,
        which means it is absent. In that case, just set the bit to 0.
    */
    internalMessage.MustStoreBoolBit(false)
  }
  internalMessages[i] = internalMessage.EndCell()
}
이제 챕터 2의 지식을 활용하여 한 번에 4개의 메시지를 보낼 수 있는 우리 지갑을 위한 메시지를 만들어보겠습니다:
- JavaScript
- Golang
import { TonClient } from '@ton/ton';
import { mnemonicToWalletKey } from '@ton/crypto';

const walletAddress = Address.parse('put your wallet address');
const client = new TonClient({
  endpoint: "https://toncenter.com/api/v2/jsonRPC",
  apiKey: "put your api key" // you can get an api key from @tonapibot bot in Telegram
});

const mnemonic = 'put your mnemonic'; // word1 word2 word3
let getMethodResult = await client.runMethod(walletAddress, "seqno"); // run "seqno" GET method from your wallet contract
let seqno = getMethodResult.stack.readNumber(); // get seqno from response

const mnemonicArray = mnemonic.split(' '); // get array from string
const keyPair = await mnemonicToWalletKey(mnemonicArray); // get Secret and Public keys from mnemonic

let toSign = beginCell()
  .storeUint(698983191, 32) // subwallet_id
  .storeUint(Math.floor(Date.now() / 1e3) + 60, 32) // Message expiration time, +60 = 1 minute
  .storeUint(seqno, 32); // store seqno
  // Do not forget that if we use Wallet V4, we need to add .storeUint(0, 8)
import (
	"context"
	"crypto/ed25519"
	"crypto/hmac"
	"crypto/sha512"
	"github.com/xssnick/tonutils-go/liteclient"
	"github.com/xssnick/tonutils-go/ton"
	"golang.org/x/crypto/pbkdf2"
	"log"
	"strings"
	"time"
)

walletAddress := address.MustParseAddr("put your wallet address")

connection := liteclient.NewConnectionPool()
configUrl := "https://ton-blockchain.github.io/global.config.json"
err := connection.AddConnectionsFromConfigUrl(context.Background(), configUrl)
if err != nil {
  panic(err)
}
client := ton.NewAPIClient(connection)

mnemonic := strings.Split("put your mnemonic", " ") // word1 word2 word3
// The following three lines will extract the private key using the mnemonic phrase.
// We will not go into cryptographic details. In the library tonutils-go, it is all implemented,
// but it immediately returns the finished object of the wallet with the address and ready-made methods.
// So we’ll have to write the lines to get the key separately. Goland IDE will automatically import
// all required libraries (crypto, pbkdf2 and others).
mac := hmac.New(sha512.New, []byte(strings.Join(mnemonic, " ")))
hash := mac.Sum(nil)
k := pbkdf2.Key(hash, []byte("TON default seed"), 100000, 32, sha512.New) // In TON libraries "TON default seed" is used as salt when getting keys
// 32 is a key len
privateKey := ed25519.NewKeyFromSeed(k)              // get private key

block, err := client.CurrentMasterchainInfo(context.Background()) // get current block, we will need it in requests to LiteServer
if err != nil {
  log.Fatalln("CurrentMasterchainInfo err:", err.Error())
  return
}

getMethodResult, err := client.RunGetMethod(context.Background(), block, walletAddress, "seqno") // run "seqno" GET method from your wallet contract
if err != nil {
  log.Fatalln("RunGetMethod err:", err.Error())
  return
}
seqno := getMethodResult.MustInt(0) // get seqno from response

toSign := cell.BeginCell().
  MustStoreUInt(698983191, 32). // subwallet_id | We consider this further
  MustStoreUInt(uint64(time.Now().UTC().Unix()+60), 32). // message expiration time, +60 = 1 minute
  MustStoreUInt(seqno.Uint64(), 32) // store seqno
  // Do not forget that if we use Wallet V4, we need to add MustStoreUInt(0, 8).
다음으로 앞서 루프에서 만든 메시지를 추가하겠습니다:
- JavaScript
- Golang
for (let index = 0; index < internalMessages.length; index++) {
  const internalMessage = internalMessages[index];
  toSign.storeUint(3, 8) // store mode of our internal message
  toSign.storeRef(internalMessage) // store our internalMessage as a reference
}
for i := 0; i < len(internalMessages); i++ {
		internalMessage := internalMessages[i]
		toSign.MustStoreUInt(3, 8) // store mode of our internal message
		toSign.MustStoreRef(internalMessage) // store our internalMessage as a reference
}
이제 위의 프로세스가 완료되었으므로 메시지에 서명하고, (이 튜토리얼의 이전 섹션에서 설명한 대로) 외부 메시지를 만들고 블록체인에 보내겠습니다:
- JavaScript
- Golang
import { sign } from '@ton/crypto';

let signature = sign(toSign.endCell().hash(), keyPair.secretKey); // get the hash of our message to wallet smart contract and sign it to get signature

let body = beginCell()
    .storeBuffer(signature) // store signature
    .storeBuilder(toSign) // store our message
    .endCell();

let externalMessage = beginCell()
    .storeUint(0b10, 2) // ext_in_msg_info$10
    .storeUint(0, 2) // src -> addr_none
    .storeAddress(walletAddress) // Destination address
    .storeCoins(0) // Import Fee
    .storeBit(0) // No State Init
    .storeBit(1) // We store Message Body as a reference
    .storeRef(body) // Store Message Body as a reference
    .endCell();

client.sendFile(externalMessage.toBoc());
import (
  "github.com/xssnick/tonutils-go/tl"
)

signature := ed25519.Sign(privateKey, toSign.EndCell().Hash()) // get the hash of our message to wallet smart contract and sign it to get signature

body := cell.BeginCell().
  MustStoreSlice(signature, 512). // store signature
  MustStoreBuilder(toSign). // store our message
  EndCell()

externalMessage := cell.BeginCell().
  MustStoreUInt(0b10, 2). // ext_in_msg_info$10
  MustStoreUInt(0, 2). // src -> addr_none
  MustStoreAddr(walletAddress). // Destination address
  MustStoreCoins(0). // Import Fee
  MustStoreBoolBit(false). // No State Init
  MustStoreBoolBit(true). // We store Message Body as a reference
  MustStoreRef(body). // Store Message Body as a reference
  EndCell()

var resp tl.Serializable
err = client.Client().QueryLiteserver(context.Background(), ton.SendMessage{Body: externalMessage.ToBOCWithFlags(false)}, &resp)

if err != nil {
  log.Fatalln(err.Error())
  return
}
lite-server 연결 관련 오류(Golang)가 발생하면 메시지를 보낼 수 있을 때까�지 코드를 실행해야 합니다. 이는 tonutils-go 라이브러리가 코드에 지정된 글로벌 구성을 통해 여러 다른 lite-server를 사용하기 때문입니다. 하지만 모든 lite-server가 우리의 연결을 받아들일 수 있는 것은 아닙니다.
이 프로세스가 완료되면 TON 블록체인 탐색기를 사용하여 지갑이 이전에 지정한 주소로 4개의 메시지를 보냈는지 확인할 수 있습니다.
NFT 전송
일반적인 메시지 외에도 사용자들은 종종 서로 NFT를 주고받습니다. 안타깝게도 모든 라이브러리가 이러한 유형의 스마트 컨트랙트와 함께 사용하도록 맞춤화된 메서드를 포함하고 있지는 않습니다. 따라서 NFT를 보내기 위한 메시지를 만들 수 있는 코드를 만들어야 합니다. 먼저 TON NFT 표준에 대해 더 자세히 알아보겠습니다.
특히 NFT 전송에 대한 TL-B를 자세히 이해해야 합니다.
-
query_id: Query ID는 메시지 처리 측면에서는 의미가 없습니다. NFT 컨트랙트는 이를 검증하지 않고 단순히 읽기만 합니다. 이 값은 서비스가 각 메시지에 특정 query ID를 할당하여 식별하고자 할 때 유용할 수 있습니다. 따라서 우리는 이를 0으로 설정하겠습니다. -
response_destination: 소유권 변경 메시지를 처리한 후에 여분의 TON이 생길 것입니다. 이것은 지정된 경우 이 주소로 보내지고, 그렇지 않��으면 NFT 잔액에 남습니다. -
custom_payload: custom_payload는 특정 작업을 수행하는 데 필요하며 일반적인 NFT에서는 사용되지 않습니다. -
forward_amount: forward_amount가 0이 아닌 경우, 지정된 TON 금액이 새 소유자에게 전송됩니다. 이를 통해 새 소유자는 무언가를 받았다는 알림을 받을 수 있습니다. -
forward_payload: forward_payload는 forward_amount와 함께 새 소유자에게 보낼 수 있는 추가 데이터입니다. 예를 들어 forward_payload를 사용하면 사용자가 NFT 전송 시 코멘트를 추가할 수 있습니다. 하지만 forward_payload가 TON의 NFT 표준에 작성되어 있음에도 불구하고, 블록체인 탐색기는 다양한 세부 정보를 표시하는 것을 완전히 지원하지 않습니다. Jetton을 표시할 때도 같은 문제가 있습니다.
이제 메시지 자체를 만들어보겠습니다:
- JavaScript
- Golang
import { Address, beginCell, toNano } from '@ton/core';

const destinationAddress = Address.parse("put your wallet where you want to send NFT");
const walletAddress = Address.parse("put your wallet which is the owner of NFT")
const nftAddress = Address.parse("put your nft address");

// We can add a comment, but it will not be displayed in the explorers,
// as it is not supported by them at the time of writing the tutorial.
const forwardPayload = beginCell()
  .storeUint(0, 32)
  .storeStringTail("Hello, TON!")
  .endCell();

const transferNftBody = beginCell()
  .storeUint(0x5fcc3d14, 32) // Opcode for NFT transfer
  .storeUint(0, 64) // query_id
  .storeAddress(destinationAddress) // new_owner
  .storeAddress(walletAddress) // response_destination for excesses
  .storeBit(0) // we do not have custom_payload
  .storeCoins(toNano("0.01")) // forward_amount
  .storeBit(1) // we store forward_payload as a reference
  .storeRef(forwardPayload) // store forward_payload as a .reference
  .endCell();

const internalMessage = beginCell().
  storeUint(0x18, 6). // bounce
  storeAddress(nftAddress).
  storeCoins(toNano("0.05")).
  storeUint(1, 1 + 4 + 4 + 64 + 32 + 1 + 1). // We store 1 that means we have body as a reference
  storeRef(transferNftBody).
  endCell();
import (
  "github.com/xssnick/tonutils-go/address"
  "github.com/xssnick/tonutils-go/tlb"
  "github.com/xssnick/tonutils-go/tvm/cell"
)

destinationAddress := address.MustParseAddr("put your wallet where you want to send NFT")
walletAddress := address.MustParseAddr("put your wallet which is the owner of NFT")
nftAddress := address.MustParseAddr("put your nft address")

// We can add a comment, but it will not be displayed in the explorers,
// as it is not supported by them at the time of writing the tutorial.
forwardPayload := cell.BeginCell().
  MustStoreUInt(0, 32).
  MustStoreStringSnake("Hello, TON!").
  EndCell()

transferNftBody := cell.BeginCell().
  MustStoreUInt(0x5fcc3d14, 32). // Opcode for NFT transfer
  MustStoreUInt(0, 64). // query_id
  MustStoreAddr(destinationAddress). // new_owner
  MustStoreAddr(walletAddress). // response_destination for excesses
  MustStoreBoolBit(false). // we do not have custom_payload
  MustStoreBigCoins(tlb.MustFromTON("0.01").NanoTON()). // forward_amount
  MustStoreBoolBit(true). // we store forward_payload as a reference
  MustStoreRef(forwardPayload). // store forward_payload as a reference
  EndCell()

internalMessage := cell.BeginCell().
  MustStoreUInt(0x18, 6). // bounce
  MustStoreAddr(nftAddress).
  MustStoreBigCoins(tlb.MustFromTON("0.05").NanoTON()).
  MustStoreUInt(1, 1 + 4 + 4 + 64 + 32 + 1 + 1). // We store 1 that means we have body as a reference
  MustStoreRef(transferNftBody).
  EndCell()
NFT 전송 opcode는 같은 표준에서 가져온 것입니다. 이제 이 튜토리얼의 이전 섹션에서 설명한 대로 메시지를 완성하겠습니다. 올바른 코드는 GitHub 저장소에서 찾을 수 있습니다.
같은 절차를 Jetton에서도 수행할 수 있습니다. 이를 위해서는 Jetton 전송을 위한 TL-B 표준을 읽어보세요. 특히 NFT와 Jetton 전송 간에 작은 차이점이 있습니다.
Wallet v3와 Wallet v4 GET 메서드
스마트 컨트랙트는 종종 GET 메서드를 사용하지만, 이들은 블록체인 내부가 아닌 클라이언트 측에서 실행됩니다. GET 메서드는 다양한 용도가 있으며 스마트 컨트랙트를 위한 다양한 데이터 유형에 대한 접근성을 제공합니다. 예를 들어 NFT 스마트 컨트랙트의 get_nft_data() 메서드를 통해 사용자는 특정 콘텐츠, 소유자, NFT 컬렉션 정보를 검색할 수 있습니다.
아래에서 V3와 V4에서 사용되는 GET 메서드의 기본 사항에 대해 더 자세히 알아보겠습니다. 먼저 두 지갑 버전에 공통적인 메서드부터 살펴보겠습니다:
| 메서드 | 설명 |
|---|---|
| int seqno() | 이 메서드는 현재 seqno를 받아서 올바른 값으로 메시지를 보내는 데 필요합니다. 이 튜토리얼의 이전 섹션에서 이 메서드를 자주 호출했습니다. |
| int get_public_key() | 이 메서드는 public key를 검색하는 데 사용됩니다. get_public_key()는 널리 사용되지는 않으며, 다양한 서비스에서 사용될 수 있습니다. 예를 들어, 일부 API 서비스는 같은 public key를 가진 여러 지갑을 검색할 수 있게 해줍니다. |
이제 V4 지갑에서만 사용하는 메서드로 넘어가겠습니다:
| 메서드 | 설명 |
|---|---|
| int get_subwallet_id() | 앞서 이것에 대해 다뤘습니다. 이 메서드를 통해 subwallet_id를 검색할 수 있습니다. |
| int is_plugin_installed(int wc, int addr_hash) | 플러그인이 설치되어 있는지 알려줍니다. 이 메서드를 호출하려면 workchain과 플러그인 주소 해시를 전달해야 합니다. |
| tuple get_plugin_list() | 이 메서드는 설치된 플러그인의 주소를 반환합니다. |
get_public_key와 is_plugin_installed 메서드를 살펴보겠습니다. 이 두 메서드를 선택한 이유는 우선 256비트의 데이터에서 public key를 가져와야 하고, 그 다음으로는 GET 메서드에 슬라이스와 다양한 유형의 데이터를 전달하는 방법을 배워야 하기 때문�입니다. 이는 이러한 메서드를 올바르게 사용하는 데 매우 유용합니다.
먼저 요청을 보낼 수 있는 클라이언트가 필요합니다. 따라서 예시로 특정 지갑 주소(EQDKbjIcfM6ezt8KjKJJLshZJJSqX7XOA4ff-W72r5gqPrHF)를 사용하겠습니다:
- JavaScript
- Golang
import { TonClient } from '@ton/ton';
import { Address } from '@ton/core';

const client = new TonClient({
    endpoint: "https://toncenter.com/api/v2/jsonRPC",
    apiKey: "put your api key" // you can get an api key from @tonapibot bot in Telegram
});

const walletAddress = Address.parse("EQDKbjIcfM6ezt8KjKJJLshZJJSqX7XOA4ff-W72r5gqPrHF"); // my wallet address as an example
import (
  "context"
  "github.com/xssnick/tonutils-go/address"
  "github.com/xssnick/tonutils-go/liteclient"
  "github.com/xssnick/tonutils-go/ton"
  "log"
)

connection := liteclient.NewConnectionPool()
configUrl := "https://ton-blockchain.github.io/global.config.json"
err := connection.AddConnectionsFromConfigUrl(context.Background(), configUrl)
if err != nil {
  panic(err)
}
client := ton.NewAPIClient(connection)

block, err := client.CurrentMasterchainInfo(context.Background()) // get current block, we will need it in requests to LiteServer
if err != nil {
  log.Fatalln("CurrentMasterchainInfo err:", err.Error())
  return
}

walletAddress := address.MustParseAddr("EQDKbjIcfM6ezt8KjKJJLshZJJSqX7XOA4ff-W72r5gqPrHF") // my wallet address as an example
이제 지갑의 GET 메서드를 호출해야 합니다.
- JavaScript
- Golang
// I always call runMethodWithError instead of runMethod to be able to check the exit_code of the called method.
let getResult = await client.runMethodWithError(walletAddress, "get_public_key"); // run get_public_key GET Method
const publicKeyUInt = getResult.stack.readBigNumber(); // read answer that contains uint256
const publicKey = publicKeyUInt.toString(16); // get hex string from bigint (uint256)
console.log(publicKey)
getResult, err := client.RunGetMethod(context.Background(), block, walletAddress, "get_public_key") // run get_public_key GET Method
if err != nil {
	log.Fatalln("RunGetMethod err:", err.Error())
	return
}

// We have a response as an array with values and should specify the index when reading it
// In the case of get_public_key, we have only one returned value that is stored at 0 index
publicKeyUInt := getResult.MustInt(0) // read answer that contains uint256
publicKey := publicKeyUInt.Text(16)   // get hex string from bigint (uint256)
log.Println(publicKey)
호출이 성공적으로 완료되면 결과는 16진수 문자열로 변환해야 하는 매우 큰 256비트 숫자입니다. 위에서 제공한 지갑 주소에 대한 결과 16진수 문자열은 다음과 같습니다: 430db39b13cf3cb76bfa818b6b13417b82be2c6c389170fbe06795c71996b1f8.
다음으로 TonAPI를 활용합니다(/v1/wallet/findByPubkey 메서드). 얻은 16진수 문자열을 시스템에 입력하면 응답 배열의 첫 번째 요소가 내 지갑임을 바로 알 수 있습니다.
그런 다음 is_plugin_installed 메서드로 넘어갑니다. 예시로 이전에 사용했던 지갑(EQAM7M--HGyfxlErAIUODrxBA3yj5roBeYiTuy6BHgJ3Sx8k)과 플러그인(EQBTKTis-SWYdupy99ozeOvnEBu8LRrQP_N9qwOTSAy3sQSZ)을 다시 사용하겠습니다:
- JavaScript
- Golang
const oldWalletAddress = Address.parse("EQAM7M--HGyfxlErAIUODrxBA3yj5roBeYiTuy6BHgJ3Sx8k"); // my old wallet address
const subscriptionAddress = Address.parseFriendly("EQBTKTis-SWYdupy99ozeOvnEBu8LRrQP_N9qwOTSAy3sQSZ"); // subscription plugin address which is already installed on the wallet
oldWalletAddress := address.MustParseAddr("EQAM7M--HGyfxlErAIUODrxBA3yj5roBeYiTuy6BHgJ3Sx8k")
subscriptionAddress := address.MustParseAddr("EQBTKTis-SWYdupy99ozeOvnEBu8LRrQP_N9qwOTSAy3sQSZ") // subscription plugin address which is already installed on the wallet
이제 GET 메서드로 보낼 수 있도록 주소를 숫자로 변환하기 위해 플러그인의 주소 해시를 검색해야 합니다:
- JavaScript
- Golang
const hash = BigInt(`0x${subscriptionAddress.address.hash.toString("hex")}`) ;

getResult = await client.runMethodWithError(oldWalletAddress, "is_plugin_installed",
[
    {type: "int", value: BigInt("0")}, // pass workchain as int
    {type: "int", value: hash} // pass plugin address hash as int
]);
console.log(getResult.stack.readNumber()); // -1
import (
  "math/big"
)

hash := big.NewInt(0).SetBytes(subscriptionAddress.Data())
// runGetMethod will automatically identify types of passed values
getResult, err = client.RunGetMethod(context.Background(), block, oldWalletAddress,
  "is_plugin_installed",
  0,    // pass workchain
  hash) // pass plugin address
if err != nil {
  log.Fatalln("RunGetMethod err:", err.Error())
  return
}

log.Println(getResult.MustInt(0)) // -1
응답은 -1이어야 하며, 이는 결과가 true라는 의미입니다. 필요한 경우 슬라이스와 셀도 보낼 수 있습니다. BigInt 대신 Slice나 Cell을 전달하고 적절한 타입을 지정하면 됩니다.
지갑을 통한 컨트랙트 배포
3장에서 우리는 지갑을 배포했습니다. 이를 위해 처음에는 TON을 보내고 그 다음 스마트 컨트랙트를 배포하기 위한 메시지를 지갑에서 보냈습니다. 하지만 이 프로세스는 외부 메시지와 함께 널리 사용되지 않으며 주로 지갑에서만 사용됩니다. 컨트랙트를 개발하는 동안 배포 프로세스는 내부 메시지를 보내는 것으로 시작됩니다.
이를 위해 3장에서 사용했던 V3R2 지갑 스마트 컨트랙트를 사용하겠습��니다.
이 경우 subwallet_id를 3 또는 같은 private key를 사용할 때 다른 주소를 가져오기 위해 필요한 다른 숫자로 설정합니다(변경 가능):
- JavaScript
- Golang
import { beginCell, Cell } from '@ton/core';
import { mnemonicToWalletKey } from '@ton/crypto';

const mnemonicArray = 'put your mnemonic'.split(" ");
const keyPair = await mnemonicToWalletKey(mnemonicArray); // extract private and public keys from mnemonic

const codeCell = Cell.fromBase64('te6ccgEBCAEAhgABFP8A9KQT9LzyyAsBAgEgAgMCAUgEBQCW8oMI1xgg0x/TH9MfAvgju/Jj7UTQ0x/TH9P/0VEyuvKhUUS68qIE+QFUEFX5EPKj+ACTINdKltMH1AL7AOgwAaTIyx/LH8v/ye1UAATQMAIBSAYHABe7Oc7UTQ0z8x1wv/gAEbjJftRNDXCx+A==');
const dataCell = beginCell()
    .storeUint(0, 32) // Seqno
    .storeUint(3, 32) // Subwallet ID
    .storeBuffer(keyPair.publicKey) // Public Key
    .endCell();

const stateInit = beginCell()
    .storeBit(0) // No split_depth
    .storeBit(0) // No special
    .storeBit(1) // We have code
    .storeRef(codeCell)
    .storeBit(1) // We have data
    .storeRef(dataCell)
    .storeBit(0) // No library
    .endCell();
import (
  "crypto/ed25519"
  "crypto/hmac"
  "crypto/sha512"
  "encoding/base64"
  "github.com/xssnick/tonutils-go/tvm/cell"
  "golang.org/x/crypto/pbkdf2"
  "strings"
)

mnemonicArray := strings.Split("put your mnemonic", " ")
// The following three lines will extract the private key using the mnemonic phrase.
// We will not go into cryptographic details. In the library tonutils-go, it is all implemented,
// but it immediately returns the finished object of the wallet with the address and ready-made methods.
// So we’ll have to write the lines to get the key separately. Goland IDE will automatically import
// all required libraries (crypto, pbkdf2 and others).
mac := hmac.New(sha512.New, []byte(strings.Join(mnemonicArray, " ")))
hash := mac.Sum(nil)
k := pbkdf2.Key(hash, []byte("TON default seed"), 100000, 32, sha512.New) // In TON libraries "TON default seed" is used as salt when getting keys
// 32 is a key len
privateKey := ed25519.NewKeyFromSeed(k)              // get private key
publicKey := privateKey.Public().(ed25519.PublicKey) // get public key from private key

BOCBytes, _ := base64.StdEncoding.DecodeString("te6ccgEBCAEAhgABFP8A9KQT9LzyyAsBAgEgAgMCAUgEBQCW8oMI1xgg0x/TH9MfAvgju/Jj7UTQ0x/TH9P/0VEyuvKhUUS68qIE+QFUEFX5EPKj+ACTINdKltMH1AL7AOgwAaTIyx/LH8v/ye1UAATQMAIBSAYHABe7Oc7UTQ0z8x1wv/gAEbjJftRNDXCx+A==")
codeCell, _ := cell.FromBOC(BOCBytes)
dataCell := cell.BeginCell().
  MustStoreUInt(0, 32).           // Seqno
  MustStoreUInt(3, 32).           // Subwallet ID
  MustStoreSlice(publicKey, 256). // Public Key
  EndCell()

stateInit := cell.BeginCell().
  MustStoreBoolBit(false). // No split_depth
  MustStoreBoolBit(false). // No special
  MustStoreBoolBit(true).  // We have code
  MustStoreRef(codeCell).
  MustStoreBoolBit(true). // We have data
  MustStoreRef(dataCell).
  MustStoreBoolBit(false). // No library
  EndCell()
다음으로 우리 컨트랙트의 주소를 가져오고 InternalMessage를 만듭니다. 또한 "Deploying..." 코멘트를 메시지에 추가합니다.
- JavaScript
- Golang
import { Address, toNano } from '@ton/core';

const contractAddress = new Address(0, stateInit.hash()); // get the hash of stateInit to get the address of our smart contract in workchain with ID 0
console.log(`Contract address: ${contractAddress.toString()}`); // Output contract address to console

const internalMessageBody = beginCell()
    .storeUint(0, 32)
    .storeStringTail('Deploying...')
    .endCell();

const internalMessage = beginCell()
    .storeUint(0x10, 6) // no bounce
    .storeAddress(contractAddress)
    .storeCoins(toNano('0.01'))
    .storeUint(0, 1 + 4 + 4 + 64 + 32)
    .storeBit(1) // We have State Init
    .storeBit(1) // We store State Init as a reference
    .storeRef(stateInit) // Store State Init as a reference
    .storeBit(1) // We store Message Body as a reference
    .storeRef(internalMessageBody) // Store Message Body Init as a reference
    .endCell();
import (
  "github.com/xssnick/tonutils-go/address"
  "github.com/xssnick/tonutils-go/tlb"
  "log"
)

contractAddress := address.NewAddress(0, 0, stateInit.Hash()) // get the hash of stateInit to get the address of our smart contract in workchain with ID 0
log.Println("Contract address:", contractAddress.String())   // Output contract address to console

internalMessageBody := cell.BeginCell().
  MustStoreUInt(0, 32).
  MustStoreStringSnake("Deploying...").
  EndCell()

internalMessage := cell.BeginCell().
  MustStoreUInt(0x10, 6). // no bounce
  MustStoreAddr(contractAddress).
  MustStoreBigCoins(tlb.MustFromTON("0.01").NanoTON()).
  MustStoreUInt(0, 1+4+4+64+32).
  MustStoreBoolBit(true).            // We have State Init
  MustStoreBoolBit(true).            // We store State Init as a reference
  MustStoreRef(stateInit).           // Store State Init as a reference
  MustStoreBoolBit(true).            // We store Message Body as a reference
  MustStoreRef(internalMessageBody). // Store Message Body Init as a reference
  EndCell()
위에서 비트가 지정되어 있고 stateInit과 internalMessageBody가 참조로 저장되어 있다는 점에 주목하세요. 링크가 별도로 저장되므로 4 (0b100) + 2 (0b10) + 1 (0b1) -> (4 + 2 + 1, 1 + 4 + 4 + 64 + 32 + 1 + 1 + 1)을 작성할 수 있는데, 이는 (0b111, 1 + 4 + 4 + 64 + 32 + 1 + 1 + 1)을 의미하며 두 개의 참조를 저장할 수 있습니다.
다음으로 우리 지갑을 위한 메시지를 준비하고 보냅니다:
- JavaScript
- Golang
import { TonClient } from '@ton/ton';
import { sign } from '@ton/crypto';

const client = new TonClient({
    endpoint: 'https://toncenter.com/api/v2/jsonRPC',
    apiKey: 'put your api key' // you can get an api key from @tonapibot bot in Telegram
});

const walletMnemonicArray = 'put your mnemonic'.split(' ');
const walletKeyPair = await mnemonicToWalletKey(walletMnemonicArray); // extract private and public keys from mnemonic
const walletAddress = Address.parse('put your wallet address with which you will deploy');
const getMethodResult = await client.runMethod(walletAddress, 'seqno'); // run "seqno" GET method from your wallet contract
const seqno = getMethodResult.stack.readNumber(); // get seqno from response

// message for our wallet
const toSign = beginCell()
    .storeUint(698983191, 32) // subwallet_id
    .storeUint(Math.floor(Date.now() / 1e3) + 60, 32) // Message expiration time, +60 = 1 minute
    .storeUint(seqno, 32) // store seqno
    // Do not forget that if we use Wallet V4, we need to add .storeUint(0, 8)
    .storeUint(3, 8)
    .storeRef(internalMessage);

const signature = sign(toSign.endCell().hash(), walletKeyPair.secretKey); // get the hash of our message to wallet smart contract and sign it to get signature
const body = beginCell()
    .storeBuffer(signature) // store signature
    .storeBuilder(toSign) // store our message
    .endCell();

const external = beginCell()
    .storeUint(0b10, 2) // indicate that it is an incoming external message
    .storeUint(0, 2) // src -> addr_none
    .storeAddress(walletAddress)
    .storeCoins(0) // Import fee
    .storeBit(0) // We do not have State Init
    .storeBit(1) // We store Message Body as a reference
    .storeRef(body) // Store Message Body as a reference
    .endCell();

console.log(external.toBoc().toString('base64'));
client.sendFile(external.toBoc());
import (
  "context"
  "github.com/xssnick/tonutils-go/liteclient"
  "github.com/xssnick/tonutils-go/tl"
  "github.com/xssnick/tonutils-go/ton"
  "time"
)

connection := liteclient.NewConnectionPool()
configUrl := "https://ton-blockchain.github.io/global.config.json"
err := connection.AddConnectionsFromConfigUrl(context.Background(), configUrl)
if err != nil {
  panic(err)
}
client := ton.NewAPIClient(connection)

block, err := client.CurrentMasterchainInfo(context.Background()) // get current block, we will need it in requests to LiteServer
if err != nil {
  log.Fatalln("CurrentMasterchainInfo err:", err.Error())
  return
}

walletMnemonicArray := strings.Split("put your mnemonic", " ")
mac = hmac.New(sha512.New, []byte(strings.Join(walletMnemonicArray, " ")))
hash = mac.Sum(nil)
k = pbkdf2.Key(hash, []byte("TON default seed"), 100000, 32, sha512.New) // In TON libraries "TON default seed" is used as salt when getting keys
// 32 is a key len
walletPrivateKey := ed25519.NewKeyFromSeed(k) // get private key
walletAddress := address.MustParseAddr("put your wallet address with which you will deploy")

getMethodResult, err := client.RunGetMethod(context.Background(), block, walletAddress, "seqno") // run "seqno" GET method from your wallet contract
if err != nil {
  log.Fatalln("RunGetMethod err:", err.Error())
  return
}
seqno := getMethodResult.MustInt(0) // get seqno from response

toSign := cell.BeginCell().
  MustStoreUInt(698983191, 32).                          // subwallet_id | We consider this further
  MustStoreUInt(uint64(time.Now().UTC().Unix()+60), 32). // message expiration time, +60 = 1 minute
  MustStoreUInt(seqno.Uint64(), 32).                     // store seqno
  // Do not forget that if we use Wallet V4, we need to add MustStoreUInt(0, 8).
  MustStoreUInt(3, 8).          // store mode of our internal message
  MustStoreRef(internalMessage) // store our internalMessage as a reference

signature := ed25519.Sign(walletPrivateKey, toSign.EndCell().Hash()) // get the hash of our message to wallet smart contract and sign it to get signature

body := cell.BeginCell().
  MustStoreSlice(signature, 512). // store signature
  MustStoreBuilder(toSign).       // store our message
  EndCell()

externalMessage := cell.BeginCell().
  MustStoreUInt(0b10, 2).       // ext_in_msg_info$10
  MustStoreUInt(0, 2).          // src -> addr_none
  MustStoreAddr(walletAddress). // Destination address
  MustStoreCoins(0).            // Import Fee
  MustStoreBoolBit(false).      // No State Init
  MustStoreBoolBit(true).       // We store Message Body as a reference
  MustStoreRef(body).           // Store Message Body as a reference
  EndCell()

var resp tl.Serializable
err = client.Client().QueryLiteserver(context.Background(), ton.SendMessage{Body: externalMessage.ToBOCWithFlags(false)}, &resp)

if err != nil {
  log.Fatalln(err.Error())
  return
}
이것으로 일반적인 지갑에 대한 작업이 끝났습니다. 이 단계에서 여러분은 지갑 스마트 컨트랙트와 상호작용하고, 메시지를 보내며, 다양한 라이브러리 유형을 사용하는 방법에 대한 확실한 이해를 가지게 되었을 것입니다.
🔥 High-Load Wallet V3
많은 메시지를 짧은 시간에 처리해야 할 때는 High-Load Wallet이라는 특별한 지갑이 필요합니다. High-Load Wallet V2는 오랫동안 TON의 주요 지갑이었지만, 매우 조심스럽게 사용해야 했습니다. 그렇지 않으면 모든 자금을 잠글 수 있었습니다.
High-Load Wallet V3의 도입으로 이 문제는 컨트랙트 아키텍처 수준에서 해결되었고 가스 소비도 줄어들었습니다. 이 장에서는 High-Load Wallet V3의 기본 사항과 기억해야 할 중요한 세부 사항을 다루겠습니다.
컨트랙트를 위한 약간 수정된 버전의 Wrapper로 작업할 것입니다. 이는 몇 가지 명확하지 않은 실수로부터 보호해줍니다.
저장소 구조
먼저 TL-B 스키마가 컨트랙트 저장소의 구조를 이해하는 데 도움이 될 것입니다:
storage$_ public_key:bits256 subwallet_id:uint32 old_queries:(HashmapE 14 ^Cell)
          queries:(HashmapE 14 ^Cell) last_clean_time:uint64 timeout:uint22
          = Storage;
TL-B에 대해 더 자세히 알아보려면 여기를 참조하세요.
컨트랙트 저장소에서 다음과 같은 필드를 찾을 수 있습니다:
| 필드 | 설명 |
|---|---|
| public_key | 컨트랙트의 공개 키. |
| subwallet_id | 지갑 ID. 같은 공개 키를 사용하여 여러 지갑을 만들 수 있게 해줍니다. |
| old_queries | 이미 처리되어 오래된 쿼리들. 각 타임아웃 후에 여기로 이동됩니다. |
| queries | 처리되었지만 아직 오래되지 않은 쿼리들. |
| last_clean_time | 마지막 정리 시간. last_clean_time < (now() - timeout)이면 queries가 old_queries로 이동됩니다. last_clean_time < (now() - 2 * timeout)이면 old_queries와 queries 모두 정리됩니다. |
| timeout | 쿼리가 old_queries로 이동되는 시간. |
Replay Protection에서 처리된 쿼리 작업에 대해 더 자세히 알아보겠습니다.
Query ID의 Shifts와 Bits Numbers
Query ID는 shift와 bit_number 두 부분으로 구성된 숫자입니다:
int shift = msg_inner_slice~load_uint(KEY_SIZE);
int bit_number = msg_inner_slice~load_uint(BIT_NUMBER_SIZE);
이렇게 하는 기본적인 이유는 이제 각 Query ID가 대부분의 경우 가스 소비를 증가시키지 않으면서 딕셔너리에서 1비트만 차지한다는 것입니다.
먼저, 컨트랙트는 shift를 사용하여 해당 인덱스의 셀을 old_queries 딕셔너리에서 가져오려고 시도합니다:
(cell value, int found) = old_queries.udict_get_ref?(KEY_SIZE, shift);
그런 셀이 발견되면, bit_number 비트만큼 건너뛰어 bit_number 인덱스의 비트에 도달합니다(수량으로서의 bit_number와 인덱스로서의 bit_number의 차이를 이해하는 것이 중요합니다). 그런 비트가 발견되면, 해당 Query ID를 가진 쿼리가 이미 처리되었다는 것을 의미하고 오류가 발생합니다:
if (found) {
    slice value_slice = value.begin_parse();
    value_slice~skip_bits(bit_number);
    throw_if(error::already_executed, value_slice.preload_int(1));
}
다음 단계는 queries 딕셔너리를 검색하는 것입니다:
(cell value, int found) = queries.udict_get_ref?(KEY_SIZE, shift);
그런 셀이 발견되면, 컨트랙트는 이를 0...bit_number-1(head)와 bit_number...1023(tail) 두 부분으로 나눕니다. 그런 다음 tail의 시작 부분에서 하나의 비트를 읽습니다(이 비트의 번호는 0부터 세기 시작하면 bit_number 변수와 같습니다. 즉, 필요한 비트의 인덱스입니다). 양수이면 해당 Query ID를 가진 요청이 이미 처리되었다는 것을 의미하고 오류가 발생합니다. 그렇지 않으면 비트가 1로 설정되고 모든 조각이 다시 하나의 셀로 병합되어 queries 딕셔너리에 다시 작성됩니다:
builder new_value = null();
if (found) {
    slice value_slice = value.begin_parse();
    (slice tail, slice head) = value_slice.load_bits(bit_number);
    throw_if(error::already_executed, tail~load_int(1));
    new_value = begin_cell().store_slice(head).store_true().store_slice(tail);
} else {
    new_value = begin_cell().store_zeroes(bit_number).store_true().store_zeroes(CELL_BITS_SIZE - bit_number - 1);
}
If you familiarize yourself with the operation of the LDSLICEX opcode (the load_bits function uses this opcode), you will notice that the read data is returned first (head) and only then the remaining data (tail), but they are in reverse order in the contract code.
실제로 이들은 역순으로 진행됩니다. stdlib에서 함수 서명의 반환된 데이터가 역순으로 진행되기 때문입니다: (slice, slice) load_bits(slice s, int len) asm(s len -> 1 0) "LDSLICEX";. 여기서 -> 1 0은 인덱스가 1인 인수(tail)를 먼저 반환한 다음 0(head)을 반환한다는 의미입니다.
결과적으로 우리는 shift가 행 인덱스이고 bit_number가 열 인덱스인 행렬로 작업하고 있습니다. 이를 통해 단일 셀에 최대 1023개의 쿼리를 저장할 수 있으며, 이는 가스 소비가 1023개의 쿼리마다 딕셔너리에 새 셀을 추가하는 경우에만 증가한다는 것을 의미합니다. 이는 값이 무작위가 아니라 순차적으로 증가하는 경우에만 해당되므로, 특별한 클래스를 사용하여 Query ID를 올바르게 증가시켜야 합니다.
이 접근 방식을 통해 타임아웃당 엄청난 수의 요청(1023 * 8192 = 8,380,416)을 저장할 수 있지만, HighloadQueryId 클래스가 8,380,415를 지원한다는 것을 알 수 있습니다. 이는 전체 제한이 소진된 경우에도 하나의 긴급 타임아웃 요청을 위한 1비트가 항상 남아있도록 하기 위한 것입니다. 이 값은 블록체인의 계정 스택에서 가능한 최대 셀 수 제한(이 글을 쓰는 시점) 때문에 설정되었습니다.
1023개의 요청을 저장할 수 있는 각 셀에 대해, 딕셔너리에 2개의 셀이 사용됩니다(하나는 키를 저장하고, 다른 하나는 값을 저장). 현재 최대 shift 값을 사용하면, 이론적인 최대값은 8192 * 2 * 2 (우리는 queries와 old_queries 두 개의 딕셔너리를 가지고 있음) = 32,768 셀입니다. 키 크기를 비트 단위로 증가시키면 현재 제한 내에 더 이상 맞지 않게 됩니다.
이전의 High-Load V2에서는 각 Query ID(64비트)가 딕셔너리에서 별도의 셀에 저장되었고, 32비트 필드 expire_at와 query_id의 결합이었습니다. 이로 인해 오래된 쿼리를 정리할 때 가스 소비가 매우 빠르게 증가했습니다.
Replay Protection
TON에서는 외부 메시지가 발신자가 없고 네트워크의 누구나 보낼 수 있다는 것을 알고 있기 때문에, 재처리를 방지하기 위해 처리된 요청 목록을 가지고 있는 것이 중요합니다. 이를 위해 High-Load Wallet V3는 queries와 old_queries 딕셔너리, 그리고 last_clean_time과 timeout 값을 사용합니다.
컨트랙트가 저장소에서 필요한 모든 데이터를 완전히 검색한 후, 마지막 쿼리 딕셔너리 정리가 언제 발생했는지 확인합니다. 마지막 정리가 timeout 시간보다 오래 전에 발생했다면, 컨트랙트는 모든 쿼리를 queries에서 old_queries로 이동시킵니다. 마지막 정리가 timeout * 2 시간보다 오래 전에 발생했다면, 컨트랙트는 추가로 old_queries도 정리합니다:
if (last_clean_time < (now() - timeout)) {
    (old_queries, queries) = (queries, null());
    if (last_clean_time < (now() - (timeout * 2))) {
        old_queries = null();
    }
    last_clean_time = now();
}
이렇게 하는 이유는 컨트랙트가 정확히 어떤 요청이 언제 실행되었는지 추적하지 않기 때문입니다. 이는 timeout이 3시간이지만 마지막 요청이 3시간에 도달하기 1분 전에 실행된 경우, 그 요청이 1분 후에 만료된 것으로 간주된다는 것을 의미합니다(3시간 타임아웃에도 불구하고). 이 문제를 해결하기 위해 두 번째 딕셔너리는 같은 쿼리를 최소한 그만큼 더 오랫동안 저장합니다.
이론적으로 쿼리는 timeout에서 timeout * 2 사이의 수명을 가지며, 이는 어떤 쿼리가 오래되었는지 추적할 때 쿼리가 오래된 것인지 확인하기 위해 최소한 timeout * 2 시간을 기다리는 것이 좋다는 것을 의미합니다.
액션 단계의 오류 방지 보장
모든 검사와 정리가 완료되면 컨트랙트는 메시지를 수락하고, 저장소를 변경하고, commit 함수를 호출할 수 있습니다. 이는 다음에 어떤 오류가 발생하더라도 계산 단계를 성공으로 간주합니다:
accept_message();

queries~udict_set_ref(KEY_SIZE, shift, new_value.end_cell());

set_data(begin_cell()
    .store_uint(public_key, PUBLIC_KEY_SIZE)
    .store_uint(subwallet_id, SUBWALLET_ID_SIZE)
    .store_dict(old_queries)
    .store_dict(queries)
    .store_uint(last_clean_time, TIMESTAMP_SIZE)
    .store_uint(timeout, TIMEOUT_SIZE)
    .end_cell());


commit();
이는 사용자가 보내려고 하는 메시지에서 오류가 발생했을 때 코드를 더 실행하면서 컨트랙트가 이전 상태로 돌아가지 않도록 하기 위해서입니다. 그렇지 않으면 외부 메시지가 유효한 상태로 남아 있어 여러 번 수락될 수 있으며, 이는 잔액 낭비로 이어집니다.
그러나 해결해야 할 또 다른 문제가 있습니다 - 액션 단계에서 발생할 수 있는 오류입니다. 메시지를 보낼 때 오류를 무시하는 플래그(2)가 있지만, 모든 경우에 작동하지는 않으므로 상태가 롤백되고 commit()가 무의미해질 수 있는 이 단계에서 오류가 발생하지 않도록 해야 합니다.
이러한 이��유로, 모든 메시지를 직접 보내는 대신 컨트랙트는 internal_transfer opcode로 자신에게 메시지를 보냅니다. 이 메시지는 액션 단계에서 오류가 발생하지 않도록 컨트랙트에 의해 자세히 파싱됩니다:
throw_if(error::invalid_message_to_send, message_slice~load_uint(1)); ;; int_msg_info$0
int msg_flags = message_slice~load_uint(3); ;; ihr_disabled:Bool bounce:Bool bounced:Bool
if (is_bounced(msg_flags)) {
    return ();
}
slice message_source_adrress = message_slice~load_msg_addr(); ;; src
throw_unless(error::invalid_message_to_send, is_address_none(message_source_adrress));
message_slice~load_msg_addr(); ;; dest
message_slice~load_coins(); ;; value.coins
message_slice = message_slice.skip_dict(); ;; value.other extra-currencies
message_slice~load_coins(); ;; ihr_fee
message_slice~load_coins(); ;; fwd_fee
message_slice~skip_bits(64 + 32); ;; created_lt:uint64 created_at:uint32
int maybe_state_init = message_slice~load_uint(1);
throw_if(error::invalid_message_to_send, maybe_state_init); ;; throw if state-init included (state-init not supported)
int either_body = message_slice~load_int(1);
if (either_body) {
    message_slice~load_ref();
    message_slice.end_parse();
}
데이터를 읽는 동안 문제가 발생하면 여전히 계산 단계이지만, commit()가 있기 때문에 이는 문제가 되지 않고 트랜잭션은 여전히 성공으로 간주됩니다. 모든 데이터가 성공적으로 읽혔다면, 이는 IGNORE_ERRORS(2) 플래그가 실패하는 모든 경우를 이러한 검사가 포함하므로 액션 단계가 오류 없이 통과할 것이라는 보장입니다. 그런 다음 컨트랙트는 메시지를 보내는 것으로 작업을 완료할 수 있습니다:
;; send message with IGNORE_ERRORS flag to ignore errors in the action phase

send_raw_message(message_to_send, send_mode | SEND_MODE_IGNORE_ERRORS);
Internal Transfer
internal_transfer가 컨트랙트에 도달하면 액션 목록을 로드하여 c5 레지스터에 설정한 다음, 실수로 코드가 변경되는 것을 방지하기 위해 set_code를 적용합니다. 이것도 액션이기 때문에 보낼 수 있는 메시지 수는 블록체인의 제한인 255개가 아닌 254개입니다. 하지만 컨트랙트는 자신을 호출하여 더 많은 메시지를 보낼 수 있으며, 이에 대해서는 나중에 설명하겠습니다:
if (op == op::internal_transfer) {
    in_msg_body~skip_query_id();
    cell actions = in_msg_body.preload_ref();
    cell old_code = my_code();
    set_actions(actions);
    set_code(old_code); ;; prevent to change smart contract code
    return ();
}
internal_transfer를 다룰 때 한 가지 중요한 세부 사항이 있습니다. 위에서 설명했듯이, 컨트랙트는 자신에게 메시지를 보내지만, 그 메시지는 사용자 측에서 완전히 수집됩니다. 문제는 메시지에 첨부될 TON의 양을 올바르게 계산해야 한다는 것입니다.
공식 저장소의 래퍼에서 이 필드는 선택사항이며, 사용자가 지정하지 않으면 mode가 128이 되어 전체 잔액이 전송됩니다. 문제는 이러한 경우 엣지 케이스가 있다는 것입니다.
많은 토큰을 보내려고 한다고 가정해봅시다. 토큰을 보낸 후 나머지 TON은 response_destination 필드에 우리 주소를 설정했기 때문에 우리 지갑으로 반환됩니다. 동시에 여러 외부 메시지를 보내기 시작하고 다음과 같은 상황이 발생합니다:
- 외부 메시지 A가 수신되어 처리되고
internal_transfer를 통해 컨트랙트의 전체 잔액을 보냅니다. - 외부 메시지 B가 도달하기 전에, 이미 완료된 토큰 전송의 수수료 중 일부가 도달합니다. 따라서 비어있지 않은 컨트랙트 잔액으로 인해 내부 메시지 B로 전체 잔액을 다시 보낼 수 있지만, 이번에는 매우 적은 양의 TON이 전송됩니다.
- 내부 메시지 A가 수신되어 처리됩니다. 토큰 전송 메시지가 보내집니다.
- 내부 메시지 B가 도달하기 전에, 외부 메시지 C가 도달하여 전체 잔액을 다시 보냅니다.
- 내부 메시지 B를 수신할 때, 토큰 전송에서 일부 추가 TON이 도달하더라도 컨트랙트에 TON이 거의 없어서 요청이 액션 단계에서 exit code = 37(잔액 부족)로 실패합니다.
따라서 컨트랙트는 실제로는 처리되지 않았을 때 요청이 처리되었다고 표시합니다. 이 시나리오를 피하기 위해, internal_transfer에 항상 1 TON을 넣는 것이 권장됩니다. 따라서 우리는 사용자가 TON의 수를 지정하도록 요구하는 수정된 래퍼로 작업하고 있습니다. 이 값은 외부 메시지 크기가 64KB로 제한되어 있고 이에 가까운 크기의 메시지는 1 TON 미만을 소비할 것이기 때문에 모든 경우에 충분할 것입니다.
High-Load Wallet V3는 나머지 메시지를 254번째 메시지에 넣어 254개 이상의 메시지를 보낼 수 있습니다. 이렇게 하면 internal_transfer가 여러 번 처리됩니다. 래퍼가 이를 자동으로 처리하므로 우리가 걱정할 필요는 없지만, 복잡한 메시지도 외부 메시지에 맞도록 한 번에 150개 이하의 메시지를 보내는 것이 권장됩니다.
외부 메시지 제한이 64KB이지만, 외부 메시지가 클수록 전달 �중 손실될 가능성이 높아지므로 150개의 메시지가 최적의 솔루션입니다.
GET 메서드
High-Load Wallet V3는 5개의 GET 메서드를 지원합니다:
| 메서드 | 설명 |
|---|---|
| int get_public_key() | 컨트랙트의 public key를 반환합니다. |
| int get_subwallet_id() | subwallet ID를 반환합니다. |
| int get_last_clean_time() | 마지막 정리 시간을 반환합니다. |
| int get_timeout() | timeout 값을 반환합니다. |
| int processed?(int query_id, int need_clean) | query_id가 처리되었는지 여부를 반환합니다. need_clean이 1로 설정된 경우, last_clean_time과 timeout을 기반으로 정리를 먼저 수행한 다음 old_queries와 queries에서 query_id를 확인합니다. |
상황에서 다르게 요구되지 않는 한 need_clean에 true를 전달하는 것이 권장됩니다. 그래야 가장 최신의 딕셔너리 상태가 반환됩니다.
High-Load Wallet V3에서 Query ID가 구성되는 방식 덕분에, 메시지가 도착하지 않은 경우 요청이 두 번 처리될 걱정 없이 같은 Query ID로 메시지를 다시 보낼 수 있습니다.
하지만 이러한 경우, 첫 번째 전송 시도 이후 timeout 시간이 지나지 않았어야 합니다. 그렇지 않으면 요청이 처리되었지만 이미 딕셔너리에서 삭제되었을 수 있습니다. 따라서 timeout을 1시간 이상, 24시간 이하로 설정하는 것이 권장됩니다.
High-Load Wallet V3 배포하기
컨트랙트를 배포하려면 code와 data 두 개의 셀이 필요합니다. 코드에는 다음 셀을 사용하겠습니다:
- JavaScript
import { Cell } from "@ton/core";

const HIGHLOAD_V3_CODE = Cell.fromBoc(Buffer.from('b5ee9c7241021001000228000114ff00f4a413f4bcf2c80b01020120020d02014803040078d020d74bc00101c060b0915be101d0d3030171b0915be0fa4030f828c705b39130e0d31f018210ae42e5a4ba9d8040d721d74cf82a01ed55fb04e030020120050a02027306070011adce76a2686b85ffc00201200809001aabb6ed44d0810122d721d70b3f0018aa3bed44d08307d721d70b1f0201200b0c001bb9a6eed44d0810162d721d70b15800e5b8bf2eda2edfb21ab09028409b0ed44d0810120d721f404f404d33fd315d1058e1bf82325a15210b99f326df82305aa0015a112b992306dde923033e2923033e25230800df40f6fa19ed021d721d70a00955f037fdb31e09130e259800df40f6fa19cd001d721d70a00937fdb31e0915be270801f6f2d48308d718d121f900ed44d0d3ffd31ff404f404d33fd315d1f82321a15220b98e12336df82324aa00a112b9926d32de58f82301de541675f910f2a106d0d31fd4d307d30cd309d33fd315d15168baf2a2515abaf2a6f8232aa15250bcf2a304f823bbf2a35304800df40f6fa199d024d721d70a00f2649130e20e01fe5309800df40f6fa18e13d05004d718d20001f264c858cf16cf8301cf168e1030c824cf40cf8384095005a1a514cf40e2f800c94039800df41704c8cbff13cb1ff40012f40012cb3f12cb15c9ed54f80f21d0d30001f265d3020171b0925f03e0fa4001d70b01c000f2a5fa4031fa0031f401fa0031fa00318060d721d300010f0020f265d2000193d431d19130e272b1fb00b585bf03', 'hex'))[0];
다른 예제와 달리, 여기서는 준비된 래퍼와 함께 작업할 것입니다. 각 메시지를 수동으로 만드는 것은 꽤 어렵고 시간이 많이 걸릴 것이기 때문입니다. HighloadWalletV3 클래스의 인스턴스를 만들기 위해 publicKey, subwalletId, timeout과 코드를 전달합니다:
- JavaScript
import { TonClient } from "@ton/ton";
import { HighloadWalletV3 } from "./wrappers/HighloadWalletV3";
import { mnemonicToWalletKey } from "@ton/crypto";

const client = new TonClient({
    endpoint: 'https://toncenter.com/api/v2/jsonRPC',
    apiKey: 'put your api key' // you can get an api key from @tonapibot bot in Telegram
});

const walletMnemonicArray = 'put your mnemonic'.split(' ');
const walletKeyPair = await mnemonicToWalletKey(walletMnemonicArray); // extract private and public keys from mnemonic
const wallet = client.open(HighloadWalletV3.createFromConfig({
    publicKey: walletKeyPair.publicKey,
    subwalletId: 0x10ad,
    timeout: 60 * 60, // 1 hour
}, HIGHLOAD_V3_CODE));

console.log(`Wallet address: ${wallet.address.toString()}`);
이제 컨트랙트를 배포할 일반 지갑이 필요합니다:
- JavaScript
import { WalletContractV3R2 } from "@ton/ton";

const deployerWalletMnemonicArray = 'put your mnemonic'.split(' ');
const deployerWalletKeyPair = await mnemonicToWalletKey(deployerWalletMnemonicArray); // extract private and public keys from mnemonic
const deployerWallet = client.open(WalletContractV3R2.create({
    publicKey: deployerWalletKeyPair.publicKey,
    workchain: 0
}));
console.log(`Deployer wallet address: ${deployerWallet.address.toString()}`);
V4 버전 지갑이 있다면 WalletContractV4 클래스를 사용할 수 있습니다. 이제 컨트랙트를 배포하기만 하면 됩니다:
- JavaScript
await wallet.sendDeploy(deployerWallet.sender(deployerWalletKeyPair.secretKey), toNano(0.05));
콘솔에 출력된 주소를 탐색기에서 보면 우리 지갑이 배포되었음을 확인할 수 있습니다.
High-Load Wallet V3 메시지 보내기
메시지 보내기도 래퍼를 통해 수행되지만, 이 경우 Query ID를 최신 상태로 유지해야 합니다. 먼저 우리 지갑 클래스의 인스턴스를 가져오겠습니다:
- JavaScript
import { Address } from "@ton/core";
import { TonClient } from "@ton/ton";
import { HighloadWalletV3 } from "./wrappers/HighloadWalletV3";
import { mnemonicToWalletKey } from "@ton/crypto";

const client = new TonClient({
    endpoint: 'https://toncenter.com/api/v2/jsonRPC',
    apiKey: 'put your api key' // you can get an api key from @tonapibot bot in Telegram
});

const walletMnemonicArray = 'put your mnemonic'.split(' ');
const walletKeyPair = await mnemonicToWalletKey(walletMnemonicArray); // extract private and public keys from mnemonic
const wallet = client.open(HighloadWalletV3.createFromAddress(Address.parse('put your high-load wallet address')));
console.log(`Wallet address: ${wallet.address.toString()}`);
이제 HighloadQueryId 클래스의 인스턴스를 만들어야 합니다. 이 클래스는 shift와 bit_number를 쉽게 다룰 수 있게 해줍니다. 이를 만들기 위해 fromShiftAndBitNumber 메서드를 사용합니다:
- JavaScript
import { HighloadQueryId } from "./wrappers/HighloadQueryId";

const queryHandler = HighloadQueryId.fromShiftAndBitNumber(0n, 0n);
이것은 첫 번째 요청이므로 0을 넣었습니다. 하지만 이전에 메시지를 보낸 적이 있다면 사용하지 않은 이 값들의 조합을 선택해야 합니다. 이제 모든 액션을 저장할 배열을 만들고 TON을 돌려받기 위한 하나의 액션을 추가하겠습니다:
- JavaScript
import { beginCell, internal, OutActionSendMsg, SendMode, toNano } from "@ton/core";

const actions: OutActionSendMsg[] = [];
actions.push({
    type: 'sendMsg',
    mode: SendMode.CARRY_ALL_REMAINING_BALANCE,
    outMsg: internal({
        to: Address.parse('put address of deployer wallet'),
        value: toNano(0),
        body: beginCell()
            .storeUint(0, 32)
            .storeStringTail('Hello, TON!')
            .endCell()
    })
});
다음으로 메시지를 보내기 위해 subwalletId, timeout, internalMessageValue, createdAt 필드를 채우기만 하면 됩니다:
- JavaScript
const subwalletId = 0x10ad;
const timeout = 60 * 60; // must be same as in the contract
const internalMessageValue = toNano(0.01); // in real case it is recommended to set the value to 1 TON
const createdAt = Math.floor(Date.now() / 1000) - 60; // LiteServers have some delay in time
await wallet.sendBatch(
    walletKeyPair.secretKey,
    actions,
    subwalletId,
    queryHandler,
    timeout,
    internalMessageValue,
    SendMode.PAY_GAS_SEPARATELY,
    createdAt
);
제출 후에는 queryHandler에서 getNext 메서드를 사용하고 현재 값을 저장해야 합니다. 실제 케이스에서는 이 값을 데이터베이스에 저장하고 timeout * 2 시간이 지난 후에 리셋해야 합니다.
- JavaScript
queryHandler.getNext();
🔥 High-Load Wallet V2 (더 이상 사용되지 않음)
상황에 따라 트랜잭션당 많은 수의 메시지를 보내야 할 필요가 있을 수 있습니다. 앞서 언급했듯이, 일반 지갑은 단일 셀에 최대 4개의 참조를 저장함으로써 한 번에 최대 4개의 메시지를 보낼 수 있습니다. high-load 지갑은 한 번에 255개의 메시지만 보낼 수 있습니다. 이 제한은 블록체인의 config 설정에서 발신 메시지(액션)의 최대 수가 255로 설정되어 있기 때문에 존재합니다.
거래소는 아마도 high-load 지갑이 대규모로 사용되는 가장 좋은 예일 것입니다. Binance와 같은 기존 거래소는 매우 큰 사용자 기반을 가지고 있어서, 짧은 시간 동안 많은 수의 출금 메시지가 처리됩니다. high-load 지갑은 이러한 출금 요청을 처리하는 데 도움이 됩니다.
High-load 지갑 FunC 코드
먼저 high-load 지갑 스마트 컨트랙트의 코드 구조를 살펴보겠습니다:
() recv_external(slice in_msg) impure {
  var signature = in_msg~load_bits(512); ;; get signature from the message body
  var cs = in_msg;
  var (subwallet_id, query_id) = (cs~load_uint(32), cs~load_uint(64)); ;; get rest values from the message body
  var bound = (now() << 32); ;; bitwise left shift operation
  throw_if(35, query_id < bound); ;; throw an error if message has expired
  var ds = get_data().begin_parse();
  var (stored_subwallet, last_cleaned, public_key, old_queries) = (ds~load_uint(32), ds~load_uint(64), ds~load_uint(256), ds~load_dict()); ;; read values from storage
  ds.end_parse(); ;; make sure we do not have anything in ds
  (_, var found?) = old_queries.udict_get?(64, query_id); ;; check if we have already had such a request
  throw_if(32, found?); ;; if yes throw an error
  throw_unless(34, subwallet_id == stored_subwallet);
  throw_unless(35, check_signature(slice_hash(in_msg), signature, public_key));
  var dict = cs~load_dict(); ;; get dictionary with messages
  cs.end_parse(); ;; make sure we do not have anything in cs
  accept_message();
💡 유용한 링크:
일반 지갑과 몇 가지 차이점을 알 수 있습니다. 이제 TON에서 high-load 지갑이 어떻게 작동하는지 더 자세히 살펴보겠습니다(이전에 다룬 subwallet은 제외).
Seqno 대신 Query ID 사용
앞서 논의했듯이, 일반 지갑의 seqno는 각 트랜잭션 후에 1씩 증가합니다. 지갑 시퀀스를 사용하는 동안 이 값이 업데이트될 때까지 기다렸다가 GET 메서드를 사용하여 이를 검색한 다음 새 메시지를 보내야 했습니다.
이 프로세스는 상당한 시간이 걸리는데, high-load 지갑은 이를 위해 설계되지 않았습니다(위에서 설명했듯이, 매우 짧은 시간에 많은 메시지를 보내는 것을 목적으로 합니다). 따라서 TON의 high-load 지갑은 query_id를 사용합니다.
같은 메시지 요청이 이미 존재하면 이미 처리되었으므로 컨트랙트가 받아들이지 않습니다:
var (stored_subwallet, last_cleaned, public_key, old_queries) = (ds~load_uint(32), ds~load_uint(64), ds~load_uint(256), ds~load_dict()); ;; read values from storage
ds.end_parse(); ;; make sure we do not have anything in ds
(_, var found?) = old_queries.udict_get?(64, query_id); ;; check if we have already had such a request
throw_if(32, found?); ;; if yes throw an error
이렇게 함으로써, 일반 지갑에서 seqno가 하던 역할과 같이 반복 메시지로부터 보호받을 수 있습니다.
메시지 보내기
컨트랙트가 외부 메시지를 수락한 후, 딕셔너리에 저장된 slices를 가져오는 루프가 시작됩니다. 이 슬라이스들은 메시지의 모드와 메시지 자체를 저장합니다. 딕셔너리가 비워질 때까지 새 메시지를 보냅니다.
int i = -1; ;; we write -1 because it will be the smallest value among all dictionary keys
do {
  (i, var cs, var f) = dict.idict_get_next?(16, i); ;; get the key and its corresponding value with the smallest key, which is greater than i
  if (f) { ;; check if any value was found
    var mode = cs~load_uint(8); ;; load message mode
    send_raw_message(cs~load_ref(), mode); ;; load message itself and send it
  }
} until (~ f); ;; if any value was found continue
💡 유용한 링크:
값이 발견되면 f는 항상 -1(true)과 같다는 점에 주목하세요. ~ -1 연산(비트 단위 not)은 항상 0을 반환할 것이므로, 루프를 계속해야 한다는 의미입니다. 동시에 딕셔너리에 메시지를 채울 때는 -1보다 큰 값(예: 0)으로 시작하여 각 메시지마다 값을 1씩 증가시켜야 합니다. 이 구조를 통해 메시지�를 올바른 순서대로 보낼 수 있습니다.
만료된 쿼리 제거
일반적으로 TON의 스마트 컨트랙트는 자체 저장비용을 지불합니다. 이는 네트워크 부하를 방지하기 위해 스마트 컨트랙트가 저장할 수 있는 데이터의 양이 제한되어 있다는 것을 의미합니다. 시스템이 더 효율적으로 작동할 수 있도록 64초 이상 지난 메시지는 저장소에서 제거됩니다. 이는 다음과 같이 수행됩니다:
bound -= (64 << 32);   ;; clean up records that have expired more than 64 seconds ago
old_queries~udict_set_builder(64, query_id, begin_cell()); ;; add current query to dictionary
var queries = old_queries; ;; copy dictionary to another variable
do {
  var (old_queries', i, _, f) = old_queries.udict_delete_get_min(64);
  f~touch();
  if (f) { ;; check if any value was found
    f = (i < bound); ;; check if more than 64 seconds have elapsed after expiration
  }
  if (f) {
    old_queries = old_queries'; ;; if yes save changes in our dictionary
    last_cleaned = i; ;; save last removed query
  }
} until (~ f);
💡 유용한 링크:
f 변수와 여러 번 상호작용해야 한다는 점에 주목하세요. TVM은 스택 머신�이므로, f 변수와 상호작용할 때마다 원하는 변수를 얻기 위해 모든 값을 팝해야 합니다. f~touch() 연산은 코드 실행을 최적화하기 위해 f 변수를 스택의 맨 위에 놓습니다.
비트 연산
이 섹션은 이전에 비트 연산을 다뤄보지 않은 사람들에게는 약간 복잡할 수 있습니다. 스마트 컨트랙트 코드에서 다음과 같은 줄을 볼 수 있습니다:
var bound = (now() << 32); ;; bitwise left shift operation
결과적으로 오른쪽 숫자만큼의 비트가 숫자에 추가됩니다. 이는 기존 값이 32비트 왼쪽으로 이동된다는 것을 의미합니다. 예를 들어, 숫자 3을 생각해보고 이를 이진 형태인 11로 변환해보겠습니다. 3 << 2 연산을 적용하면, 11이 2비트 자리만큼 이동합니다. 이는 문자열의 오른쪽에 두 개의 비트가 추가된다는 것을 의미합니다. 결과적으로 1100이 되며, 이는 12입니다.
이 프로세스에서 가장 먼저 이해해야 할 것은 now() 함수가 uint32를 반환한다는 것을 기억하는 것입니다. 이는 결과 값이 32비트가 될 것이라는 것을 의미합니다. 32비트를 왼쪽으로 이동시킴으로써 또 다른 uint32를 위한 공간이 열리고, 결과적으로 올바른 query_id가 만들어집니다. 이렇게 해서 타임스탬프와 query_id를 하나의 변수로 결합할 수 있어 최적화가 가능합니다.
다음으로 다음과 같은 코드 라인을 보겠습니다:
bound -= (64 << 32); ;; clean up the records that have expired more than 64 seconds ago
위에서 우리는 숫자 64를 32비트만큼 이동시키는 연산을 수행하여 타임스탬프에서 64초를 뺐습니다. 이렇게 하면 과거의 query_id를 비교하여 받은 값보다 작은지 확인할 수 있습니다. 만약 그렇다면, 64초 이상 전에 만료된 것입니다:
if (f) { ;; check if any value has been found
  f = (i < bound); ;; check if more than 64 seconds have elapsed after expiration
}
이를 더 잘 이해하기 위해 타임스탬프 예시로 1625918400을 사용해보겠습니다. 이진 표현(32비트를 위해 왼쪽에 0을 추가)은 01100000111010011000101111000000입니다. 32비트 왼쪽 시프트를 수행하면, 우리 숫자의 이진 표현 끝에 32개의 0이 생깁니다.
그런 다음 64 << 32를 빼면 64초 전에 같은 query_id를 가진 타임스탬프가 됩니다. 이는 다음 계산을 수행하여 확인할 수 있습니다: ((1625918400 << 32) - (64 << 32)) >> 32. 이렇게 하면 우리 숫자의 필요한 부분(타임스탬프)을 비교할 수 있고 동시에 query_id는 방해되지 않습니다.
저장소 업데이트
모든 작업이 완료되면 새로운 값을 저장소에 저장하는 것만 남았습니다:
  set_data(begin_cell()
    .store_uint(stored_subwallet, 32)
    .store_uint(last_cleaned, 64)
    .store_uint(public_key, 256)
    .store_dict(old_queries)
    .end_cell());
}
GET 메서드
지갑 배포와 메시지 생성으로 넘어가기 전에 마지막으로 살펴볼 것은 high-load 지갑의 GET 메서드입니다:
| 메서드 | 설명 |
|---|---|
| int processed?(int QUERY_ID) | 특정 요청이 처리되었는지 사용자에게 알려줍니다. 즉, 요청이 처리되었으면 -1을 반환하고 처리되지 않았으면 0을 반환합니다. 또한 요청이 오래되어 더 이상 컨트랙트에 저장되어 있지 않은 경우 이 메서드는 1을 반환할 수 있습니다. |
| int get_public_key() | public key를 검색합니다. 이 메서드는 이전에 살펴보았습니다. |
last_cleaned를 왜 사용해야 하는지 이해하기 위해 int processed?(int query_id) 메서드를 자세히 살펴보겠습니다:
int processed?(int query_id) method_id {
  var ds = get_data().begin_parse();
  var (_, last_cleaned, _, old_queries) = (ds~load_uint(32), ds~load_uint(64), ds~load_uint(256), ds~load_dict());
  ds.end_parse();
  (_, var found) = old_queries.udict_get?(64, query_id);
  return found ? true : - (query_id <= last_cleaned);
}
last_cleaned는 컨트랙트의 저장소와 오래된 쿼리의 딕셔너리에서 검색됩니다. 쿼리가 발견되면 true를 반환하고, 발견되지 않으면 표현식 - (query_id <= last_cleaned)를 반환합니다. last_cleaned는 요청을 삭제할 때 최소 타임스탬프부터 시작했기 때문에 가장 높은 타임스탬프를 가진 마지막으로 제거된 요청을 포함합니다.
이는 메서드에 전달된 query_id가 last_cleaned 값보다 작은 경우, 그것이 컨트랙트에 있었는지 여부를 판단할 수 없다는 것을 의미합니다. 따라서 query_id <= last_cleaned는 -1을 반환하고 이 표현식 앞의 마이너스는 답을 1로 바꿉니다. query_id가 last_cleaned보다 크다면 아직 처리되지 않은 것입니다.
High-Load Wallet V2 배포하기
high-load 지갑을 배포하려면 먼저 사용자가 사��용할 니모닉 키를 생성해야 합니다. 이 튜토리얼의 이전 섹션에서 사용한 것과 같은 키를 사용할 수 있습니다.
high-load 지갑을 배포하는 프로세스를 시작하려면 스마트 컨트랙트의 코드를 stdlib.fc와 wallet_v3가 있는 같은 디렉토리에 복사하고 코드 시작 부분에 #include "stdlib.fc";를 추가하는 것을 잊지 마세요. 다음으로 섹션 3에서 했던 것처럼 high-load 지갑 코드를 컴파일하겠습니다:
- JavaScript
import { compileFunc } from '@ton-community/func-js';
import fs from 'fs'
import { Cell } from '@ton/core';

const result = await compileFunc({
    targets: ['highload_wallet.fc'], // targets of your project
    sources: {
        'stdlib.fc': fs.readFileSync('./src/stdlib.fc', { encoding: 'utf-8' }),
        'highload_wallet.fc': fs.readFileSync('./src/highload_wallet.fc', { encoding: 'utf-8' }),
    }
});

if (result.status === 'error') {
console.error(result.message)
return;
}

const codeCell = Cell.fromBoc(Buffer.from(result.codeBoc, 'base64'))[0];

// now we have base64 encoded BOC with compiled code in result.codeBoc
console.log('Code BOC: ' + result.codeBoc);
console.log('\nHash: ' + codeCell.hash().toString('base64')); // get the hash of cell and convert in to base64 encoded string
터미널에 다음과 같은 출력이 표시됩니다:
Code BOC: te6ccgEBCQEA5QABFP8A9KQT9LzyyAsBAgEgAgMCAUgEBQHq8oMI1xgg0x/TP/gjqh9TILnyY+1E0NMf0z/T//QE0VNggED0Dm+hMfJgUXO68qIH+QFUEIf5EPKjAvQE0fgAf44WIYAQ9HhvpSCYAtMH1DAB+wCRMuIBs+ZbgyWhyEA0gED0Q4rmMQHIyx8Tyz/L//QAye1UCAAE0DACASAGBwAXvZznaiaGmvmOuF/8AEG+X5dqJoaY+Y6Z/p/5j6AmipEEAgegc30JjJLb/JXdHxQANCCAQPSWb6VsEiCUMFMDud4gkzM2AZJsIeKz

Hash: lJTRzI7fEvBWcaGpugmSEJbrUIEeGSTsZcPGKfu4CBI=
위의 결과를 사용하여 다른 라이브러리와 언어에서 다음과 같이 base64로 인코딩된 출력을 사용하여 우리 지갑 코드가 있는 셀을 검색할 수 있습니다:
- Golang
import (
  "encoding/base64"
  "github.com/xssnick/tonutils-go/tvm/cell"
  "log"
)

base64BOC := "te6ccgEBCQEA5QABFP8A9KQT9LzyyAsBAgEgAgMCAUgEBQHq8oMI1xgg0x/TP/gjqh9TILnyY+1E0NMf0z/T//QE0VNggED0Dm+hMfJgUXO68qIH+QFUEIf5EPKjAvQE0fgAf44WIYAQ9HhvpSCYAtMH1DAB+wCRMuIBs+ZbgyWhyEA0gED0Q4rmMQHIyx8Tyz/L//QAye1UCAAE0DACASAGBwAXvZznaiaGmvmOuF/8AEG+X5dqJoaY+Y6Z/p/5j6AmipEEAgegc30JjJLb/JXdHxQANCCAQPSWb6VsEiCUMFMDud4gkzM2AZJsIeKz" // save our base64 encoded output from compiler to variable
codeCellBytes, _ := base64.StdEncoding.DecodeString(base64BOC) // decode base64 in order to get byte array
codeCell, err := cell.FromBOC(codeCellBytes) // get cell with code from byte array
if err != nil { // check if there is any error
  panic(err)
}

log.Println("Hash:", base64.StdEncoding.EncodeToString(codeCell.Hash())) // get the hash of our cell, encode it to base64 because it has []byte type and output to the terminal
이제 초�기 데이터로 구성된 셀을 검색하고, State Init을 만들고, high-load 지갑 주소를 계산해야 합니다. 스마트 컨트랙트 코드를 공부한 결과 subwallet_id, last_cleaned, public_key, old_queries가 순서대로 저장소에 저장된다는 것을 알 수 있습니다:
- JavaScript
- Golang
import { Address, beginCell } from '@ton/core';
import { mnemonicToWalletKey } from '@ton/crypto';

const highloadMnemonicArray = 'put your mnemonic that you have generated and saved before'.split(' ');
const highloadKeyPair = await mnemonicToWalletKey(highloadMnemonicArray); // extract private and public keys from mnemonic

const dataCell = beginCell()
    .storeUint(698983191, 32) // Subwallet ID
    .storeUint(0, 64) // Last cleaned
    .storeBuffer(highloadKeyPair.publicKey) // Public Key
    .storeBit(0) // indicate that the dictionary is empty
    .endCell();

const stateInit = beginCell()
    .storeBit(0) // No split_depth
    .storeBit(0) // No special
    .storeBit(1) // We have code
    .storeRef(codeCell)
    .storeBit(1) // We have data
    .storeRef(dataCell)
    .storeBit(0) // No library
    .endCell();

const contractAddress = new Address(0, stateInit.hash()); // get the hash of stateInit to get the address of our smart contract in workchain with ID 0
console.log(`Contract address: ${contractAddress.toString()}`); // Output contract address to console
import (
  "crypto/ed25519"
  "crypto/hmac"
  "crypto/sha512"
  "github.com/xssnick/tonutils-go/address"
  "golang.org/x/crypto/pbkdf2"
  "strings"
)

highloadMnemonicArray := strings.Split("put your mnemonic that you have generated and saved before", " ") // word1 word2 word3
mac := hmac.New(sha512.New, []byte(strings.Join(highloadMnemonicArray, " ")))
hash := mac.Sum(nil)
k := pbkdf2.Key(hash, []byte("TON default seed"), 100000, 32, sha512.New) // In TON libraries "TON default seed" is used as salt when getting keys
// 32 is a key len
highloadPrivateKey := ed25519.NewKeyFromSeed(k)                      // get private key
highloadPublicKey := highloadPrivateKey.Public().(ed25519.PublicKey) // get public key from private key

dataCell := cell.BeginCell().
  MustStoreUInt(698983191, 32).           // Subwallet ID
  MustStoreUInt(0, 64).                   // Last cleaned
  MustStoreSlice(highloadPublicKey, 256). // Public Key
  MustStoreBoolBit(false).                // indicate that the dictionary is empty
  EndCell()

stateInit := cell.BeginCell().
  MustStoreBoolBit(false). // No split_depth
  MustStoreBoolBit(false). // No special
  MustStoreBoolBit(true).  // We have code
  MustStoreRef(codeCell).
  MustStoreBoolBit(true). // We have data
  MustStoreRef(dataCell).
  MustStoreBoolBit(false). // No library
  EndCell()

contractAddress := address.NewAddress(0, 0, stateInit.Hash()) // get the hash of stateInit to get the address of our smart contract in workchain with ID 0
log.Println("Contract address:", contractAddress.String())    // Output contract address to console
위에서 설명한 모든 내용은 지갑을 통한 컨트랙트 배포 섹션과 같은 단계를 따릅니다. 더 잘 이해하려면 전체 GitHub 소스 코드를 참조하세요.
High-Load Wallet V2 메시지 보내기
이제 한 트랜잭션당 여러 메시지를 동시에 보내도록 high-load 지갑을 프로그래밍해보겠습니다. 예를 들어, 가스 비용이 적도록 트랜잭션당 12개의 메시지를 보내겠습니다.
트랜잭션을 완료하려면 컨트랙트의 잔액이 최소 0.5 TON이어야 합니다.
각 메시지는 코드와 함께 자체 코멘트를 가지며 목적지 주소는 배포에 사용한 지갑이 됩니다:
- JavaScript
- Golang
import { Address, beginCell, Cell, toNano } from '@ton/core';

let internalMessages:Cell[] = [];
const walletAddress = Address.parse('put your wallet address from which you deployed high-load wallet');

for (let i = 0; i < 12; i++) {
    const internalMessageBody = beginCell()
        .storeUint(0, 32)
        .storeStringTail(`Hello, TON! #${i}`)
        .endCell();

    const internalMessage = beginCell()
        .storeUint(0x18, 6) // bounce
        .storeAddress(walletAddress)
        .storeCoins(toNano('0.01'))
        .storeUint(0, 1 + 4 + 4 + 64 + 32)
        .storeBit(0) // We do not have State Init
        .storeBit(1) // We store Message Body as a reference
        .storeRef(internalMessageBody) // Store Message Body Init as a reference
        .endCell();

    internalMessages.push(internalMessage);
}
import (
  "fmt"
  "github.com/xssnick/tonutils-go/address"
  "github.com/xssnick/tonutils-go/tlb"
  "github.com/xssnick/tonutils-go/tvm/cell"
)

var internalMessages []*cell.Cell
walletAddress := address.MustParseAddr("put your wallet address from which you deployed high-load wallet")

for i := 0; i < 12; i++ {
  comment := fmt.Sprintf("Hello, TON! #%d", i)
  internalMessageBody := cell.BeginCell().
    MustStoreUInt(0, 32).
    MustStoreBinarySnake([]byte(comment)).
    EndCell()

  internalMessage := cell.BeginCell().
    MustStoreUInt(0x18, 6). // bounce
    MustStoreAddr(walletAddress).
    MustStoreBigCoins(tlb.MustFromTON("0.001").NanoTON()).
    MustStoreUInt(0, 1+4+4+64+32).
    MustStoreBoolBit(false). // We do not have State Init
    MustStoreBoolBit(true). // We store Message Body as a reference
    MustStoreRef(internalMessageBody). // Store Message Body Init as a reference
    EndCell()

  messageData := cell.BeginCell().
    MustStoreUInt(3, 8). // transaction mode
    MustStoreRef(internalMessage).
    EndCell()

	internalMessages = append(internalMessages, messageData)
}
위 프로세스를 완료한 후, 결과적으로 내부 메시지 배열이 생성됩니다. 다음으로 메시지 저장을 위한 딕셔너리를 만들고 메시지 본문을 준비하고 서명해야 합니다. 이는 다음과 같이 수행됩니다:
- JavaScript
- Golang
import { Dictionary } from '@ton/core';
import { mnemonicToWalletKey, sign } from '@ton/crypto';
import * as crypto from 'crypto';

const dictionary = Dictionary.empty<number, Cell>(); // create an empty dictionary with the key as a number and the value as a cell
for (let i = 0; i < internalMessages.length; i++) {
    const internalMessage = internalMessages[i]; // get our message from an array
    dictionary.set(i, internalMessage); // save the message in the dictionary
}

const queryID = crypto.randomBytes(4).readUint32BE(); // create a random uint32 number, 4 bytes = 32 bits
const now = Math.floor(Date.now() / 1000); // get current timestamp
const timeout = 120; // timeout for message expiration, 120 seconds = 2 minutes
const finalQueryID = (BigInt(now + timeout) << 32n) + BigInt(queryID); // get our final query_id
console.log(finalQueryID); // print query_id. With this query_id we can call GET method to check if our request has been processed

const toSign = beginCell()
    .storeUint(698983191, 32) // subwallet_id
    .storeUint(finalQueryID, 64)
    // Here we create our own method that will save the
    // message mode and a reference to the message
    .storeDict(dictionary, Dictionary.Keys.Int(16), {
        serialize: (src, buidler) => {
            buidler.storeUint(3, 8); // save message mode, mode = 3
            buidler.storeRef(src); // save message as reference
        },
        // We won't actually use this, but this method
        // will help to read our dictionary that we saved
        parse: (src) => {
            let cell = beginCell()
                .storeUint(src.loadUint(8), 8)
                .storeRef(src.loadRef())
                .endCell();
            return cell;
        }
    }
);

const highloadMnemonicArray = 'put your high-load wallet mnemonic'.split(' ');
const highloadKeyPair = await mnemonicToWalletKey(highloadMnemonicArray); // extract private and public keys from mnemonic
const highloadWalletAddress = Address.parse('put your high-load wallet address');

const signature = sign(toSign.endCell().hash(), highloadKeyPair.secretKey); // get the hash of our message to wallet smart contract and sign it to get signature
import (
  "crypto/ed25519"
  "crypto/hmac"
  "crypto/sha512"
  "golang.org/x/crypto/pbkdf2"
  "log"
  "math/big"
  "math/rand"
  "strings"
  "time"
)

dictionary := cell.NewDict(16) // create an empty dictionary with the key as a number and the value as a cell
for i := 0; i < len(internalMessages); i++ {
  internalMessage := internalMessages[i]                             // get our message from an array
  err := dictionary.SetIntKey(big.NewInt(int64(i)), internalMessage) // save the message in the dictionary
  if err != nil {
    return
  }
}

queryID := rand.Uint32()
timeout := 120                                                               // timeout for message expiration, 120 seconds = 2 minutes
now := time.Now().Add(time.Duration(timeout)*time.Second).UTC().Unix() << 32 // get current timestamp + timeout
finalQueryID := uint64(now) + uint64(queryID)                                // get our final query_id
log.Println(finalQueryID)                                                    // print query_id. With this query_id we can call GET method to check if our request has been processed

toSign := cell.BeginCell().
  MustStoreUInt(698983191, 32). // subwallet_id
  MustStoreUInt(finalQueryID, 64).
  MustStoreDict(dictionary)

highloadMnemonicArray := strings.Split("put your high-load wallet mnemonic", " ") // word1 word2 word3
mac := hmac.New(sha512.New, []byte(strings.Join(highloadMnemonicArray, " ")))
hash := mac.Sum(nil)
k := pbkdf2.Key(hash, []byte("TON default seed"), 100000, 32, sha512.New) // In TON libraries "TON default seed" is used as salt when getting keys
// 32 is a key len
highloadPrivateKey := ed25519.NewKeyFromSeed(k) // get private key
highloadWalletAddress := address.MustParseAddr("put your high-load wallet address")

signature := ed25519.Sign(highloadPrivateKey, toSign.EndCell().Hash())
JavaScript와 TypeScript를 사용할 때 우리 �메시지가 전송 모드 없이 배열에 저장되었다는 점에 주목하세요. 이는 @ton/ton 라이브러리를 사용할 때 개발자가 직접 직렬화와 역직렬화 프로세스를 구현해야 하기 때문입니다. 따라서 먼저 메시지 모드를 저장하고 그 다음에 메시지 자체를 저장하는 메서드가 전달됩니다. 값 메서드에 Dictionary.Values.Cell() 사양을 사용하면 모드를 따로 저장하지 않고 전체 메시지를 셀 참조로 저장합니다.
다음으로 외부 메시지를 만들고 블록체인에 보내겠습니다:
- JavaScript
- Golang
import { TonClient } from '@ton/ton';

const body = beginCell()
    .storeBuffer(signature) // store signature
    .storeBuilder(toSign) // store our message
    .endCell();

const externalMessage = beginCell()
    .storeUint(0b10, 2) // indicate that it is an incoming external message
    .storeUint(0, 2) // src -> addr_none
    .storeAddress(highloadWalletAddress)
    .storeCoins(0) // Import fee
    .storeBit(0) // We do not have State Init
    .storeBit(1) // We store Message Body as a reference
    .storeRef(body) // Store Message Body as a reference
    .endCell();

// We do not need a key here as we will be sending 1 request per second
const client = new TonClient({
    endpoint: 'https://toncenter.com/api/v2/jsonRPC',
    // apiKey: 'put your api key' // you can get an api key from @tonapibot bot in Telegram
});

client.sendFile(externalMessage.toBoc());
import (
  "context"
  "github.com/xssnick/tonutils-go/liteclient"
  "github.com/xssnick/tonutils-go/tl"
  "github.com/xssnick/tonutils-go/ton"
)

body := cell.BeginCell().
  MustStoreSlice(signature, 512). // store signature
  MustStoreBuilder(toSign). // store our message
  EndCell()

externalMessage := cell.BeginCell().
  MustStoreUInt(0b10, 2). // ext_in_msg_info$10
  MustStoreUInt(0, 2). // src -> addr_none
  MustStoreAddr(highloadWalletAddress). // Destination address
  MustStoreCoins(0). // Import Fee
  MustStoreBoolBit(false). // No State Init
  MustStoreBoolBit(true). // We store Message Body as a reference
  MustStoreRef(body). // Store Message Body as a reference
  EndCell()

connection := liteclient.NewConnectionPool()
configUrl := "https://ton-blockchain.github.io/global.config.json"
err := connection.AddConnectionsFromConfigUrl(context.Background(), configUrl)
if err != nil {
  panic(err)
}
client := ton.NewAPIClient(connection)

var resp tl.Serializable
err = client.Client().QueryLiteserver(context.Background(), ton.SendMessage{Body: externalMessage.ToBOCWithFlags(false)}, &resp)

if err != nil {
  log.Fatalln(err.Error())
  return
}
이 프로세스가 완료되면 우리 지갑을 조회하여 12개의 발신 메시지가 우리 지갑에서 전송되었는지 확인할 수 있습니다. 또한 콘솔에서 처음 사용한 query_id로 processed? GET 메서드를 호출할 수 있습니다. 이 요청이 올바르게 처리되었다면 -1(true)을 결과로 제공할 것입니다.
🏁 결론
이 튜토리얼을 통해 TON 블록체인에서 서로 다른 유형의 지갑이 어떻게 작동하는지 더 잘 이해하게 되었습니다. 또한 사전 정의된 라이브러리 메서드를 사용하지 않고 외부 및 내부 메시지를 만드는 방법을 배웠습니다.
이를 통해 라이브러리 사용에 의존하지 않고 TON 블록체인의 구조를 더 깊이 이해할 수 있게 되었습니다. 또한 high-load 지갑을 사용하는 방법을 배우고 다양한 데이터 타입과 여러 작업과 관련된 많은 세부 사항을 분석했습니다.
🧩 다음 단계
위 문서를 읽는 것은 복잡한 작업이며 TON 플랫폼의 전체를 이해하기는 어렵습니다. 하지만 TON에서 구축하는 것에 열정을 가진 사람들에게는 좋은 연습이 됩니다. 다음 리소스를 참조하여 TON에서 스마트 컨트랙트를 작성하는 방법을 배우는 것을 추천합니다: FunC 개요, 모범 사례, 스마트 컨트랙트 예시, FunC 쿡북
또한 다음 문서들을 더 자세히 읽어보는 것을 추천합니다: ton.pdf와 tblkch.pdf 문서.
📬 저자 소개
이 문서 섹션에 대해 질문, 의견 또는 제안이 있으시면 Telegram(@aSpite 또는 @SpiteMoriarty) 또는 GitHub를 통해 저자에게 연락하세요.
📖 참고 자료
주요 코드 소스:
공식 문서:
외부 참조: